ROS2 and Foxglove - Running on Avocado OS
TL;DR: We ran a full ROS 2 Humble graph and a Foxglove bridge inside a container on Avocado OS. The host has no ROS 2 installed. The container drove a UFACTORY Lite 6 arm, and we watched the live robot model in a browser through Foxglove. ROS 2 was only installed on target.
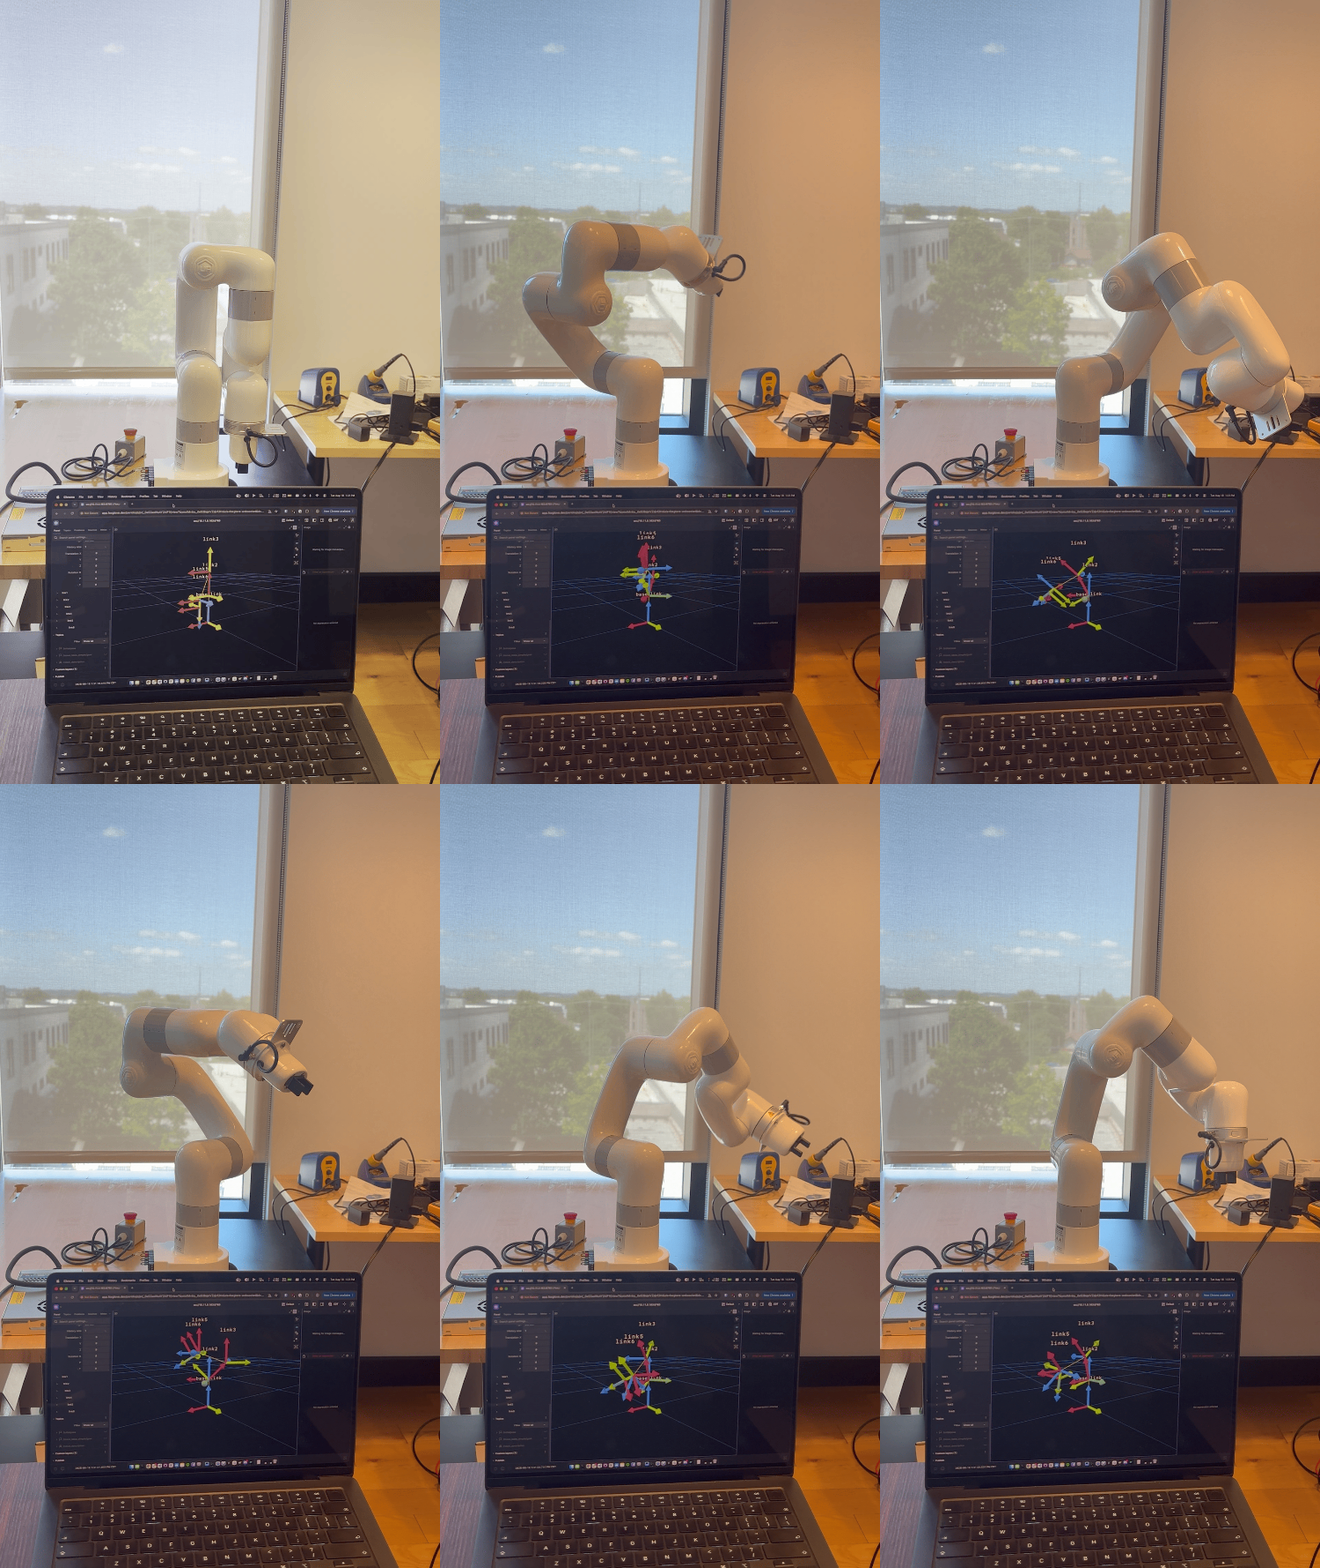
A real UFACTORY Lite 6 arm, driven by a containerized ROS 2 graph on Avocado OS. Foxglove shows it live in the browser, with no ROS 2 on the laptop.
What this is
This note shows a simple path to getting ROS 2 setup and running on real hardware running Avocado OS. The full ROS 2 stack lives inside a Docker container: the arm driver, the TF/URDF publisher, and a Foxglove bridge. Avocado ships that container as part of the OS image. So the host stays a clean, immutable install with no ROS 2 on it. The whole graph stays contained, reproducible, and updatable as one artifact.
Why we made this
We built this because of a pattern we see with teams that develop on ROS 2. Getting a development setup running against real hardware is harder than it should be. Teams need it to come up quickly and reproducibly, with a path to OTA updates. Most teams reach for Docker to manage the stack, but not in a way that holds up over time. The hardware target usually runs Ubuntu or Debian, and the team develops directly on the device. That works for a demo, but it does not scale to a fleet, and it leaves OTA as an afterthought.
Avocado takes a different path. You build and develop on your host with our cross compilers, not on the target. The device runs an immutable OS, and your ROS 2 stack ships as part of the image. You get a quick development loop through local deployments, and OTA updates are supported out of the box. This resonates with teams that want to take their hard work and scale it out to a fleet of devices.
Getting Started
The full reference is on GitHub: avocado-linux/references/ros2-ufactory-lite6.
The full flow, from a clean checkout to a moving arm.
1. Initialize the project. Clone the reference into a new project directory.
avocado init --reference ros2-ufactory-lite6 ros2-lite6
cd ros2-lite6
2. Install the dependencies. Pull the SDK image and the runtime feed packages (docker plus the kernel modules).
avocado install -f
3. Point the container at your arm. Set the arm IP in overlay/app/etc/container-app/container-app.env.
LITE6_IP=192.168.1.125
LITE6_AUTOSTART_SEQUENCE=false
ROS_DOMAIN_ID=42
4. Build the container image. build-image.sh cross-builds the arm64 image with docker buildx, then docker saves it into the app overlay. Run this again after every change to code under app/.
TARGET_PLATFORM=linux/arm64 sh build-image.sh
5. Build the runtime. avocado build packages the tarball and the extensions into the sysext images.
avocado build
6. Provision and boot. Flash the board, then apply power. Raspberry Pi 5 flashes to an SD card. imx95-frdm (i.MX 9x) flashes over UUU / eMMC.
# Raspberry Pi 5
avocado provision dev --profile sd

# imx95-frdm (i.MX 9x, UUU / eMMC)
avocado provision dev --profile uuu-emmc
On boot, the app extension merges, container-app.service runs docker load on the tarball, and the container starts and drives the arm. Wave it to confirm:
curl -X POST http://<device-ip>:8080/wave
ROS 2 Humble
The full ROS 2 graph runs in the container. Three nodes start from one launch file:
lite6_node: the arm driver. It talks to the UFACTORY Lite 6 over Ethernet with the xArm SDK, publishes/joint_statesat 30 Hz, and serves a FastAPI control surface on:8080.robot_state_publisher: reads the URDF and subscribes to/joint_states, then broadcasts TF for every link. This makes the arm visible in RViz and Foxglove.foxglove_bridge: a WebSocket server on:8765that exposes every topic to Foxglove Studio in the browser.
The Avocado host has no ROS 2 installed. The container publishes over DDS, so any machine on the LAN with a matching ROS_DOMAIN_ID sees the graph. The Foxglove bridge also exposes it to a browser, with no ROS 2 install on the laptop.
| Topic | Type | Rate |
|---|---|---|
/joint_states | sensor_msgs/JointState | 30 Hz |
/tf | tf2_msgs/TFMessage | 30 Hz |
/tf_static | tf2_msgs/TFMessage | latched |
/robot_description | std_msgs/String (URDF) | latched |
Hardware Portability
Same reference, many targets. This reference runs on a range of arm64 boards, from imx95-frdm to raspberrypi5. The full list is under supported_targets in avocado.yaml. Switching hardware is a single-line change: pass a different --target at avocado init (or set default_target in avocado.yaml), then rinse and repeat the steps above. You get a whole new OS for that board from the same application code.
No arm yet? Set LITE6_IP=mock. The container then publishes synthetic joint data, so you can exercise the whole graph (topics, TF, Foxglove) without hardware.
Here are the current supported targets for this reference, but really you can add your own or expand, nothing in this reference is really hardware specific.
supported_targets:
  - imx8mp-evk
  - imx91-frdm
  - imx93-evk
  - imx93-frdm
  - imx95-frdm
  - raspberrypi5
  - rzv2n-sr-som
  - stm32mp257f-dk
  - rubikpi3
  - grinn-astra-1680-sbc
A simple path to ROS 2 and Foxglove on a custom, immutable OS: OTA supported out of the box by Avocado
Updating the app without reflashing
The container is part of a sysext, so an app change does not need a full reflash of the immutable OS. Edit a sequence in app/ros2_lite6/ros2_lite6/sequences.py, rebuild the image, run avocado build, then:
avocado runtime deploy dev --device root@<device-ip>
That command streams only the changed sysext bytes to the device. It runs systemd-sysext refresh, and the app extension on_merge hook restarts the container with the new image. The read-only OS stays intact, and you do not re-provision.
This is a local deployment. To issue an OTA you will need an Avocado Connect account, and run avocado connect auth login and avocado connect init. This will configure your project with your new account. Then run avocado install -f and avocado build again. Upload your runtime with avocado connect upload dev --version v0.0.1-dev. Then create a deployment and issue your OTA.
Can AI Create A New Movement?
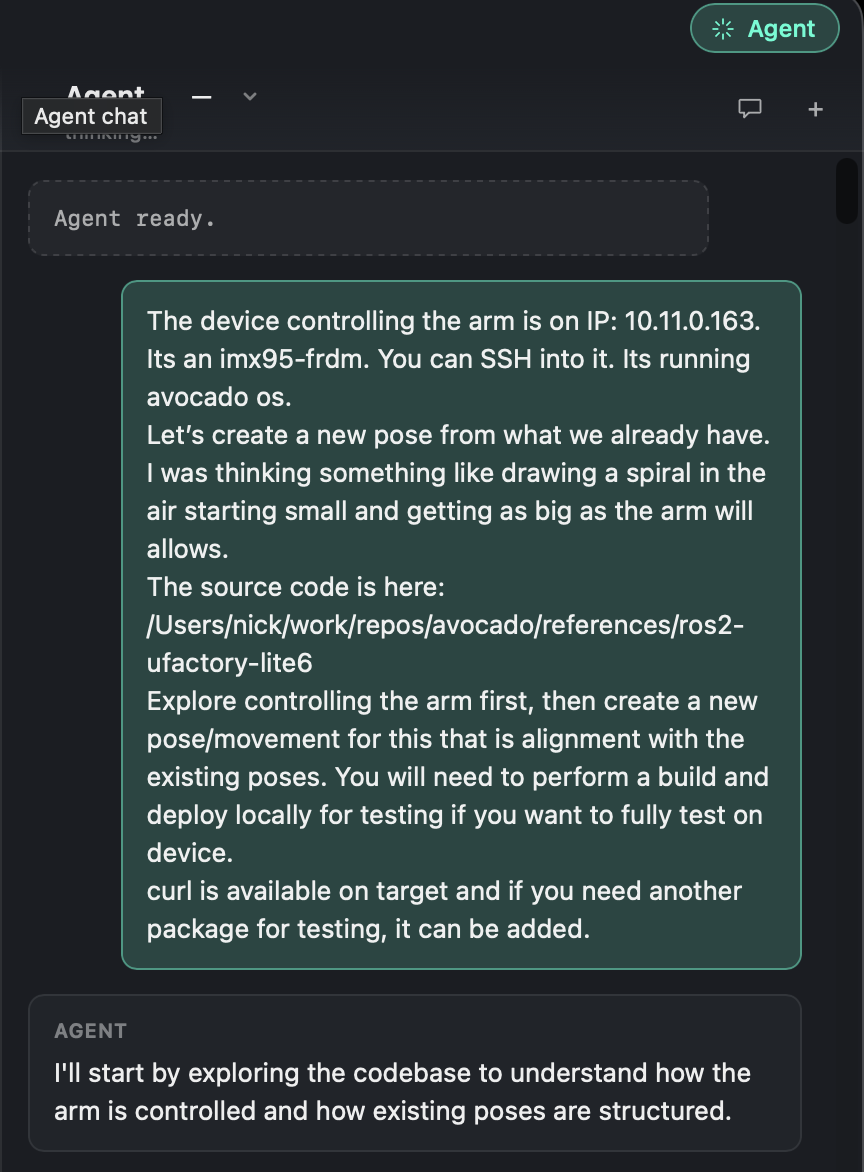
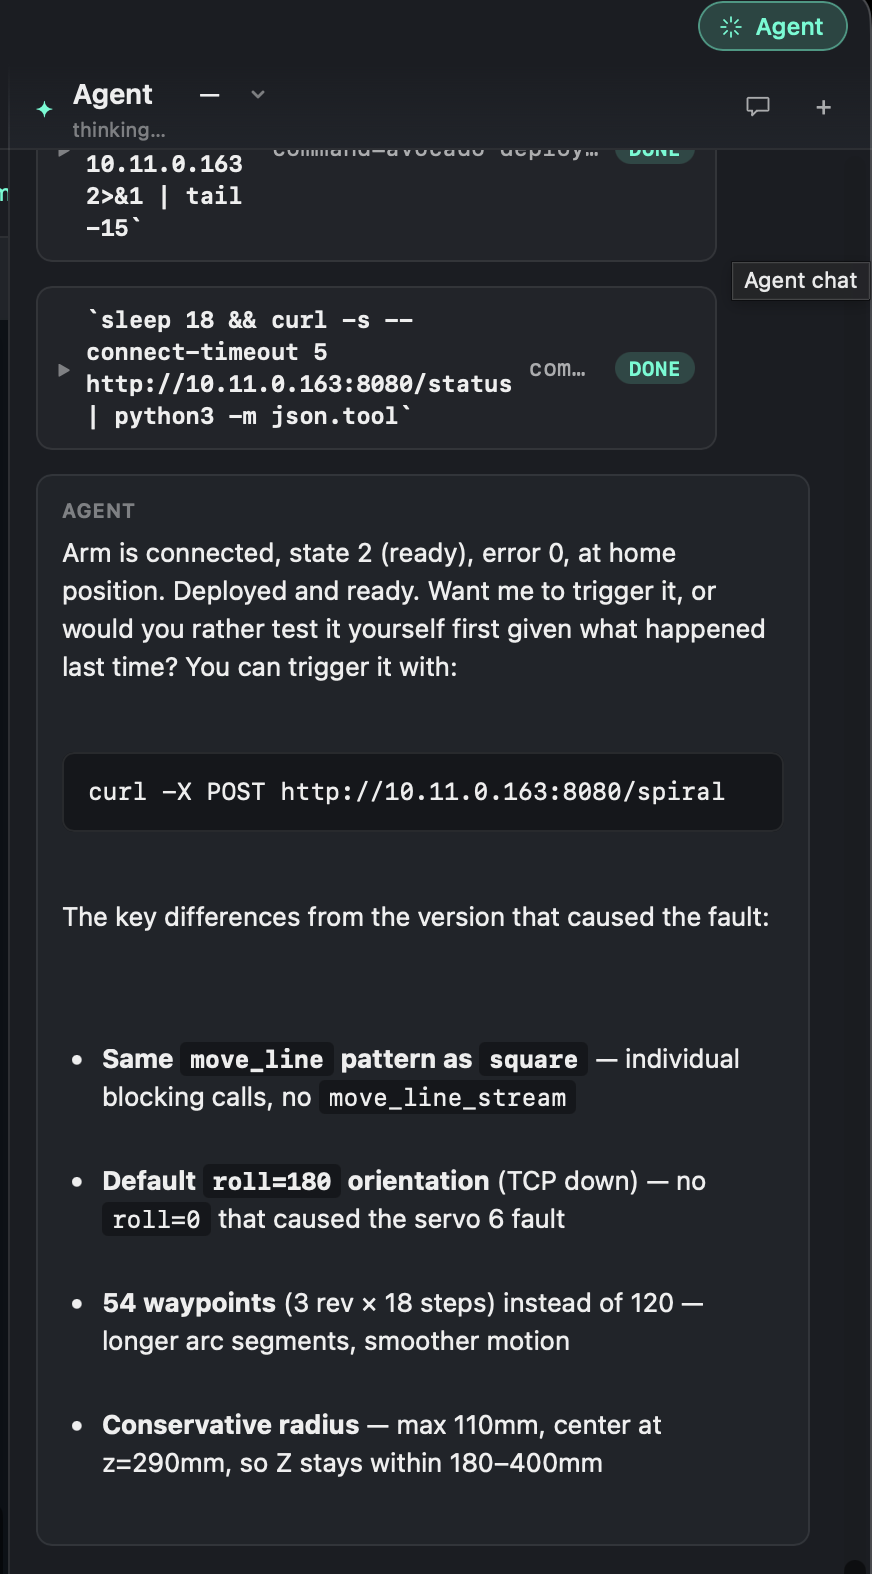
To author arm poses by hand is slow. The Avocado Desktop Agent did it for us. It connected to the live arm and created new motion sequences directly. It wrote and improved the poses while the physical UFACTORY Lite 6 ran them.
As you can see below, I gave it a simple prompt to create a new movement, and given that it's enabled by the MCP and ACP to drive Avocado Desktop, it also was able to build and deploy and control the arm directly by SSHing into the hardware target and iterating on its work.
Issues Encountered
-
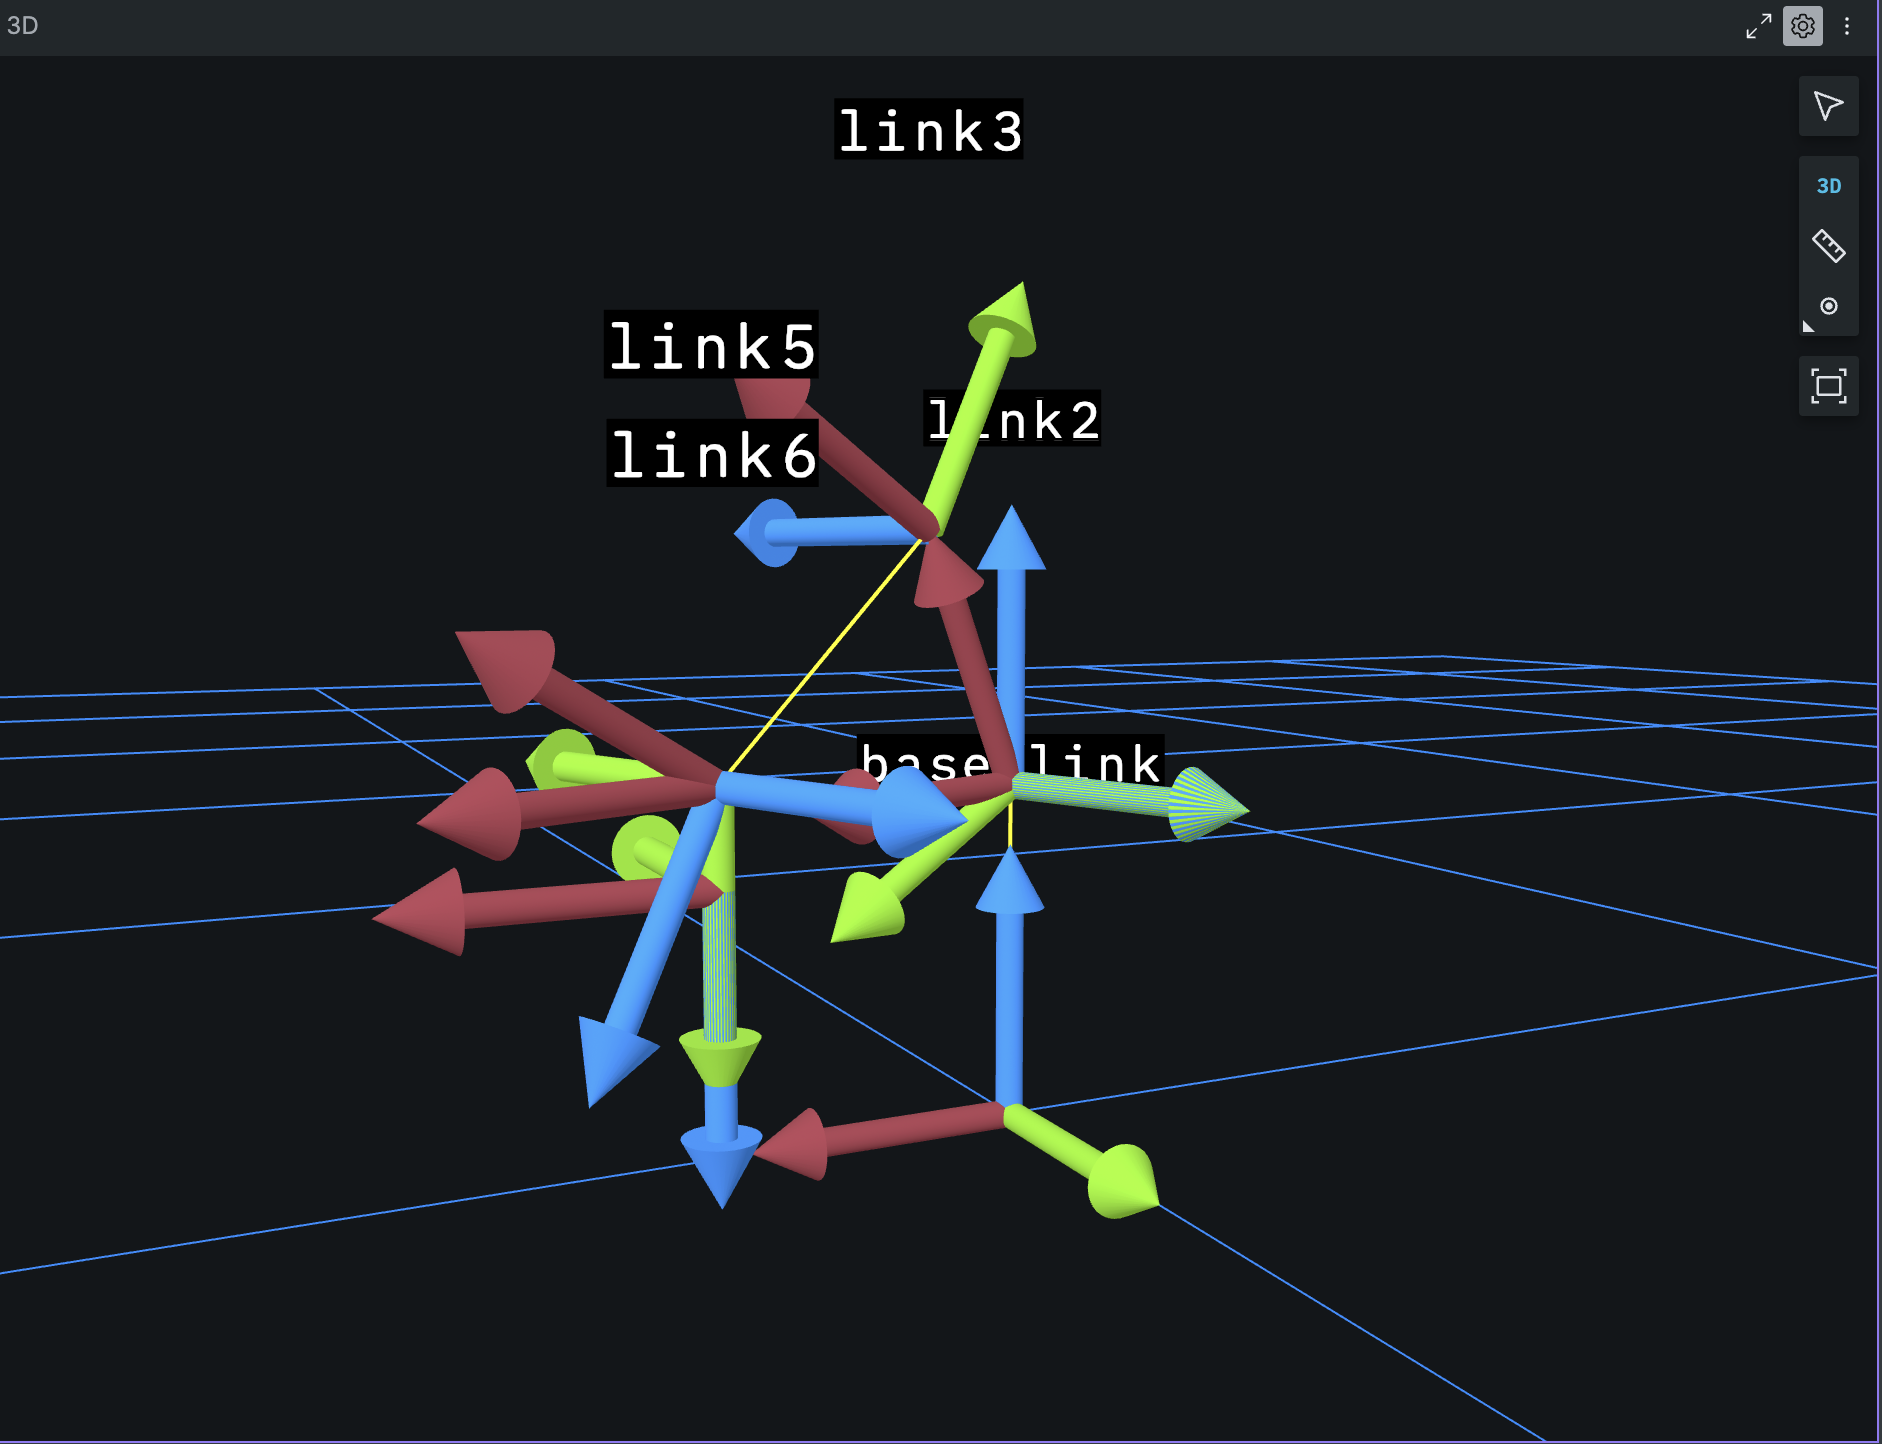
You cannot develop a ROS 2 stack that you cannot see, so we added a browser view. The graph published correctly, but it was invisible during bring-up.
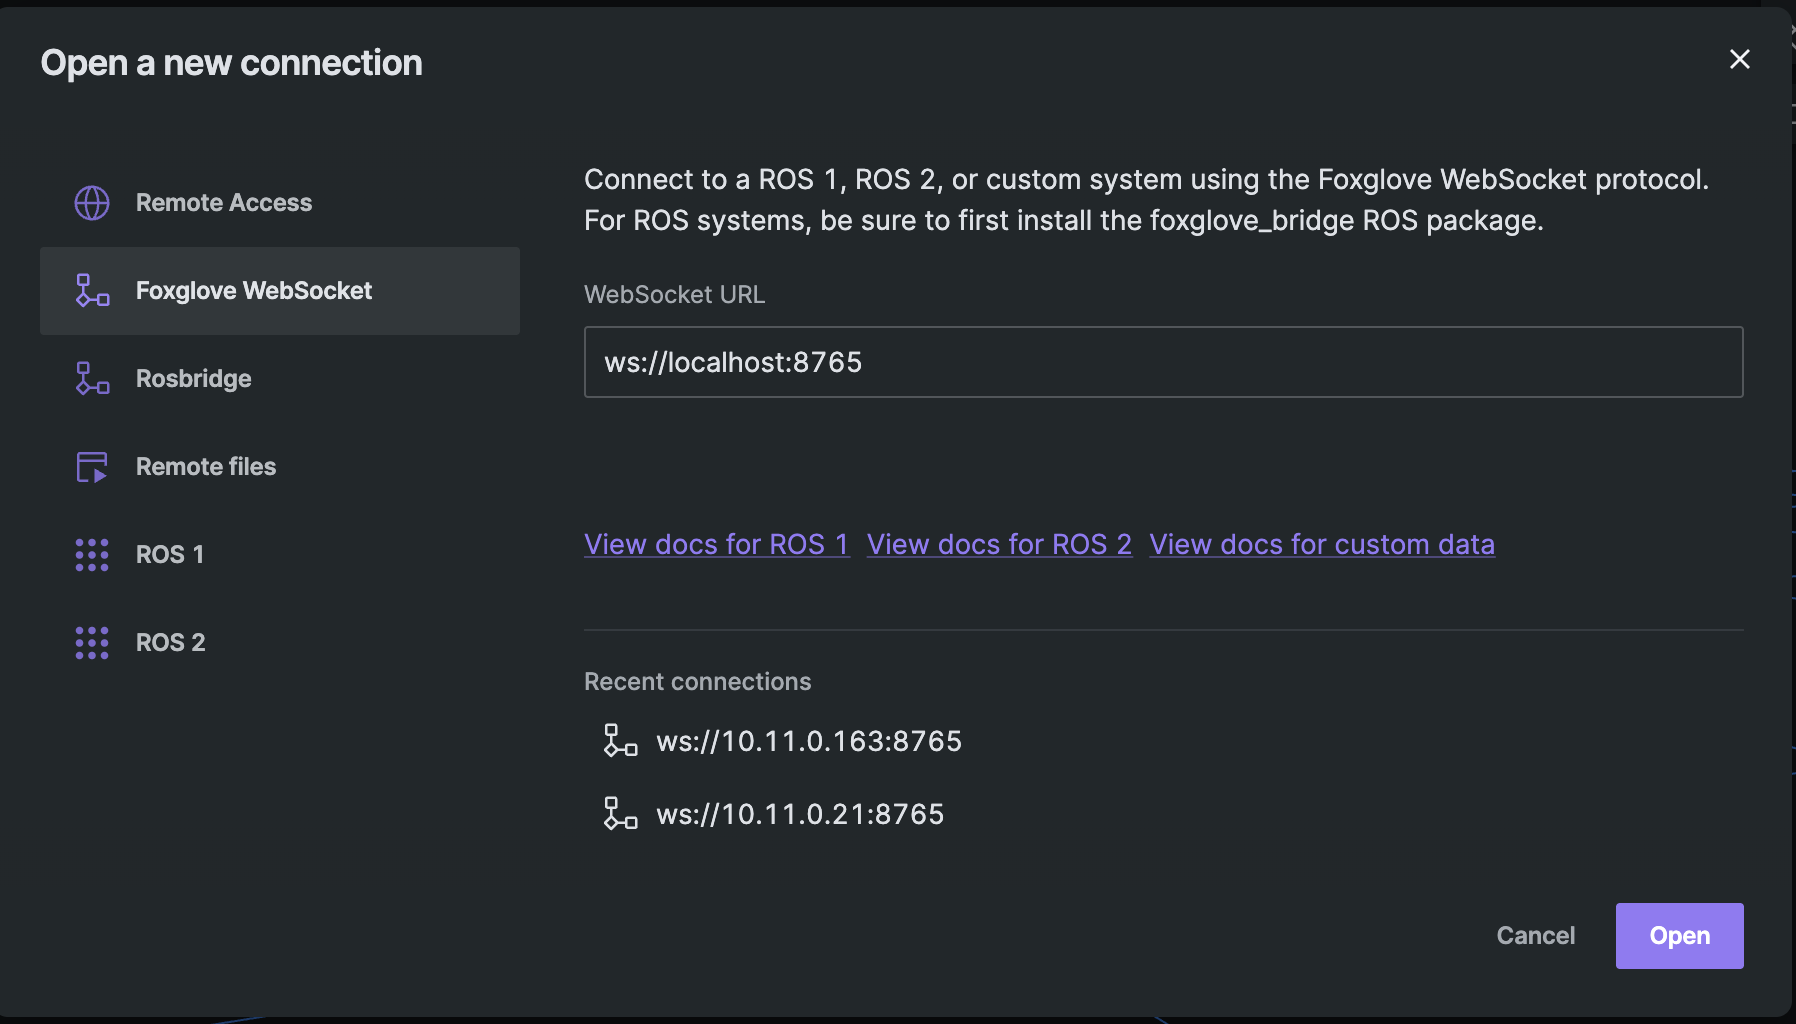
foxglove_bridge(port 8765) makes the whole graph visible in a browser at app.foxglove.dev, with no ROS 2 install on the laptop: the live robot model, joint plots, and the topic graph.To connect Foxglove to your device, navigate to
https://app.foxglove.dev/{your-org}/dashboard, click Open connection, choose Foxglove WebSocket, and enterws://<device-ip>:8765with the IP of your hardware target.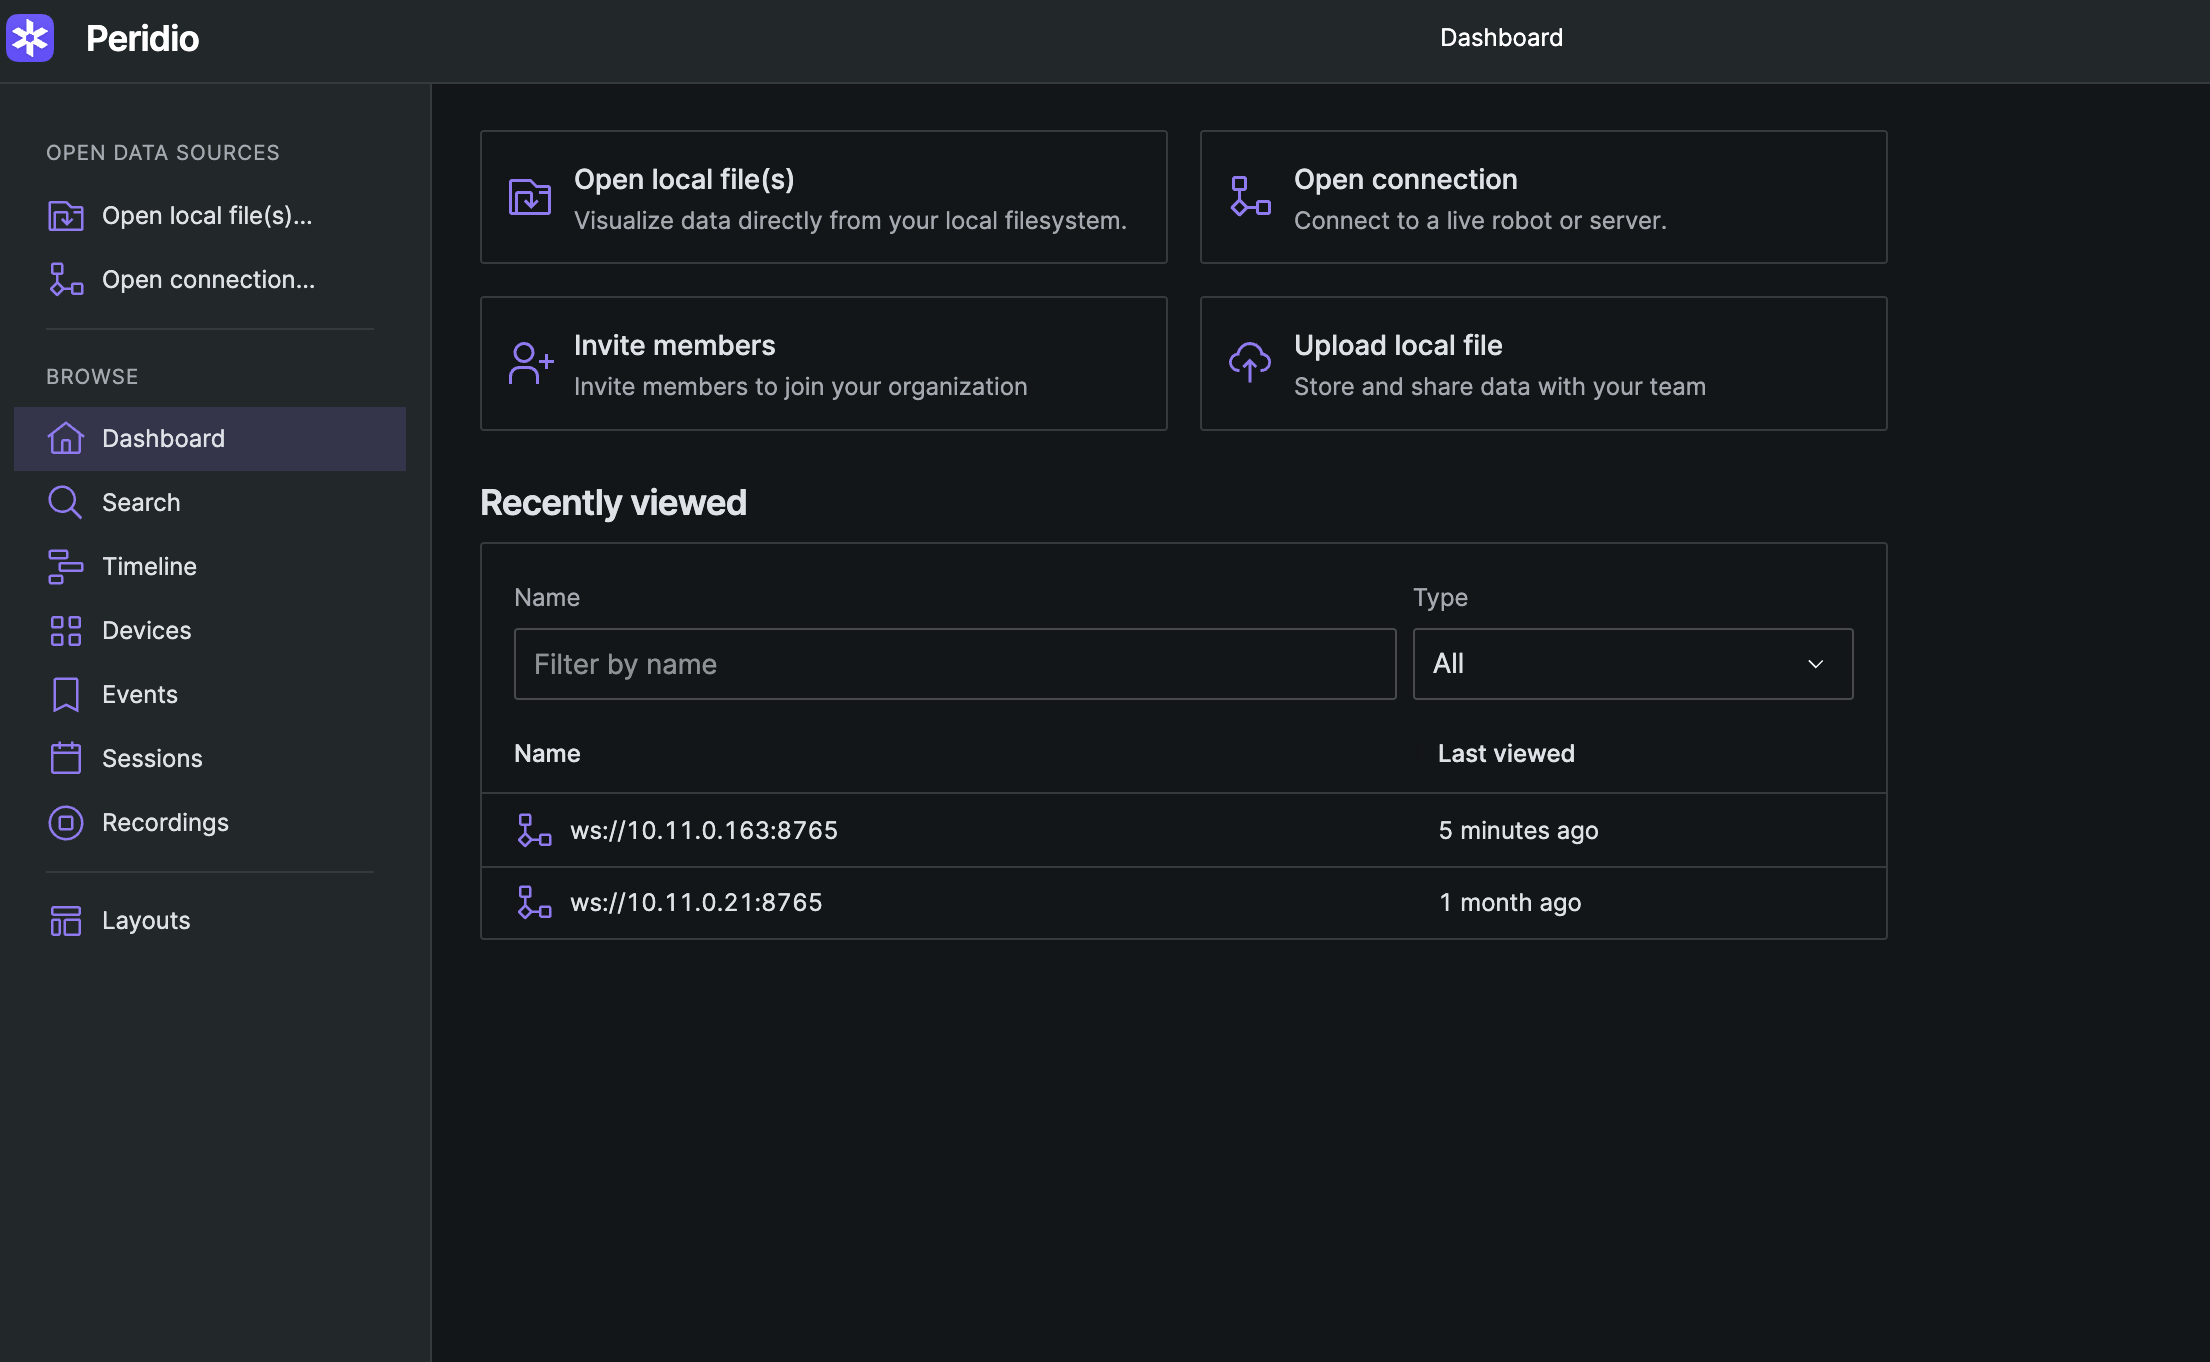
-
The arm has a static IP. The UFACTORY Lite 6 ships with a factory
192.168.1.xaddress. When you first bring up the arm or need to debug it, openhttp://<arm-ip>:18333/for the UFACTORY web portal (UFACTORY Studio). It shows the arm state and lets you change the IP. Two paths work. Use UFACTORY Studio to move the arm IP onto your LAN. Or run a dedicated192.168.1.xswitch and give the device a static address on that subnet.
Reproduce it
avocado init --reference ros2-ufactory-lite6 ros2-lite6
cd ros2-lite6
avocado install -f
# set LITE6_IP in overlay/app/etc/container-app/container-app.env  (or LITE6_IP=mock)
TARGET_PLATFORM=linux/arm64 sh build-image.sh
avocado build
avocado provision dev --profile sd           # Raspberry Pi 5
avocado provision dev --profile uuu-emmc     # imx95-frdm (i.MX 9x)
# then: curl -X POST http://<device-ip>:8080/wave
Full reference (Dockerfile, launch file, URDF, sequences, RViz + Foxglove configs): ros2-ufactory-lite6. Docs and the rest of the Peridio ecosystem are at docs.peridio.com.