Provision
This guide will walk you through the process of provisioning an NVIDIA Jetson Orin Nano using the Avocado CLI. For general information on provisioning, see the provisioning reference.
Prerequisites
- NVIDIA Jetson Orin Nano Developer Kit
- An NVMe SSD (M.2 2280 form factor)
- Host machine
- Ubuntu 22.04+ or Fedora 39+ per reliable provisioning
- Support for
binfmt_miscandqemu-user-static - 16 GB available disk space
- The latest version of the Avocado CLI
- Accessories
- A host-compatible-USB to 3.3 V TTY UART adapter for serial console access
- A host-compatible-USB to USB-C cable for provisioning
Some Linux operating systems, like Ubuntu, will attempt to auto-mount mass storage devices. This can interfere with Avocado's ability to finalize provisioning a device.
Before provisioning, disable auto-mounting. The following example is for Ubuntu (GNOME desktop); the same commands apply to other GNOME-based distributions such as Fedora Workstation.
gsettings set org.gnome.desktop.media-handling automount false
gsettings set org.gnome.desktop.media-handling automount-open false
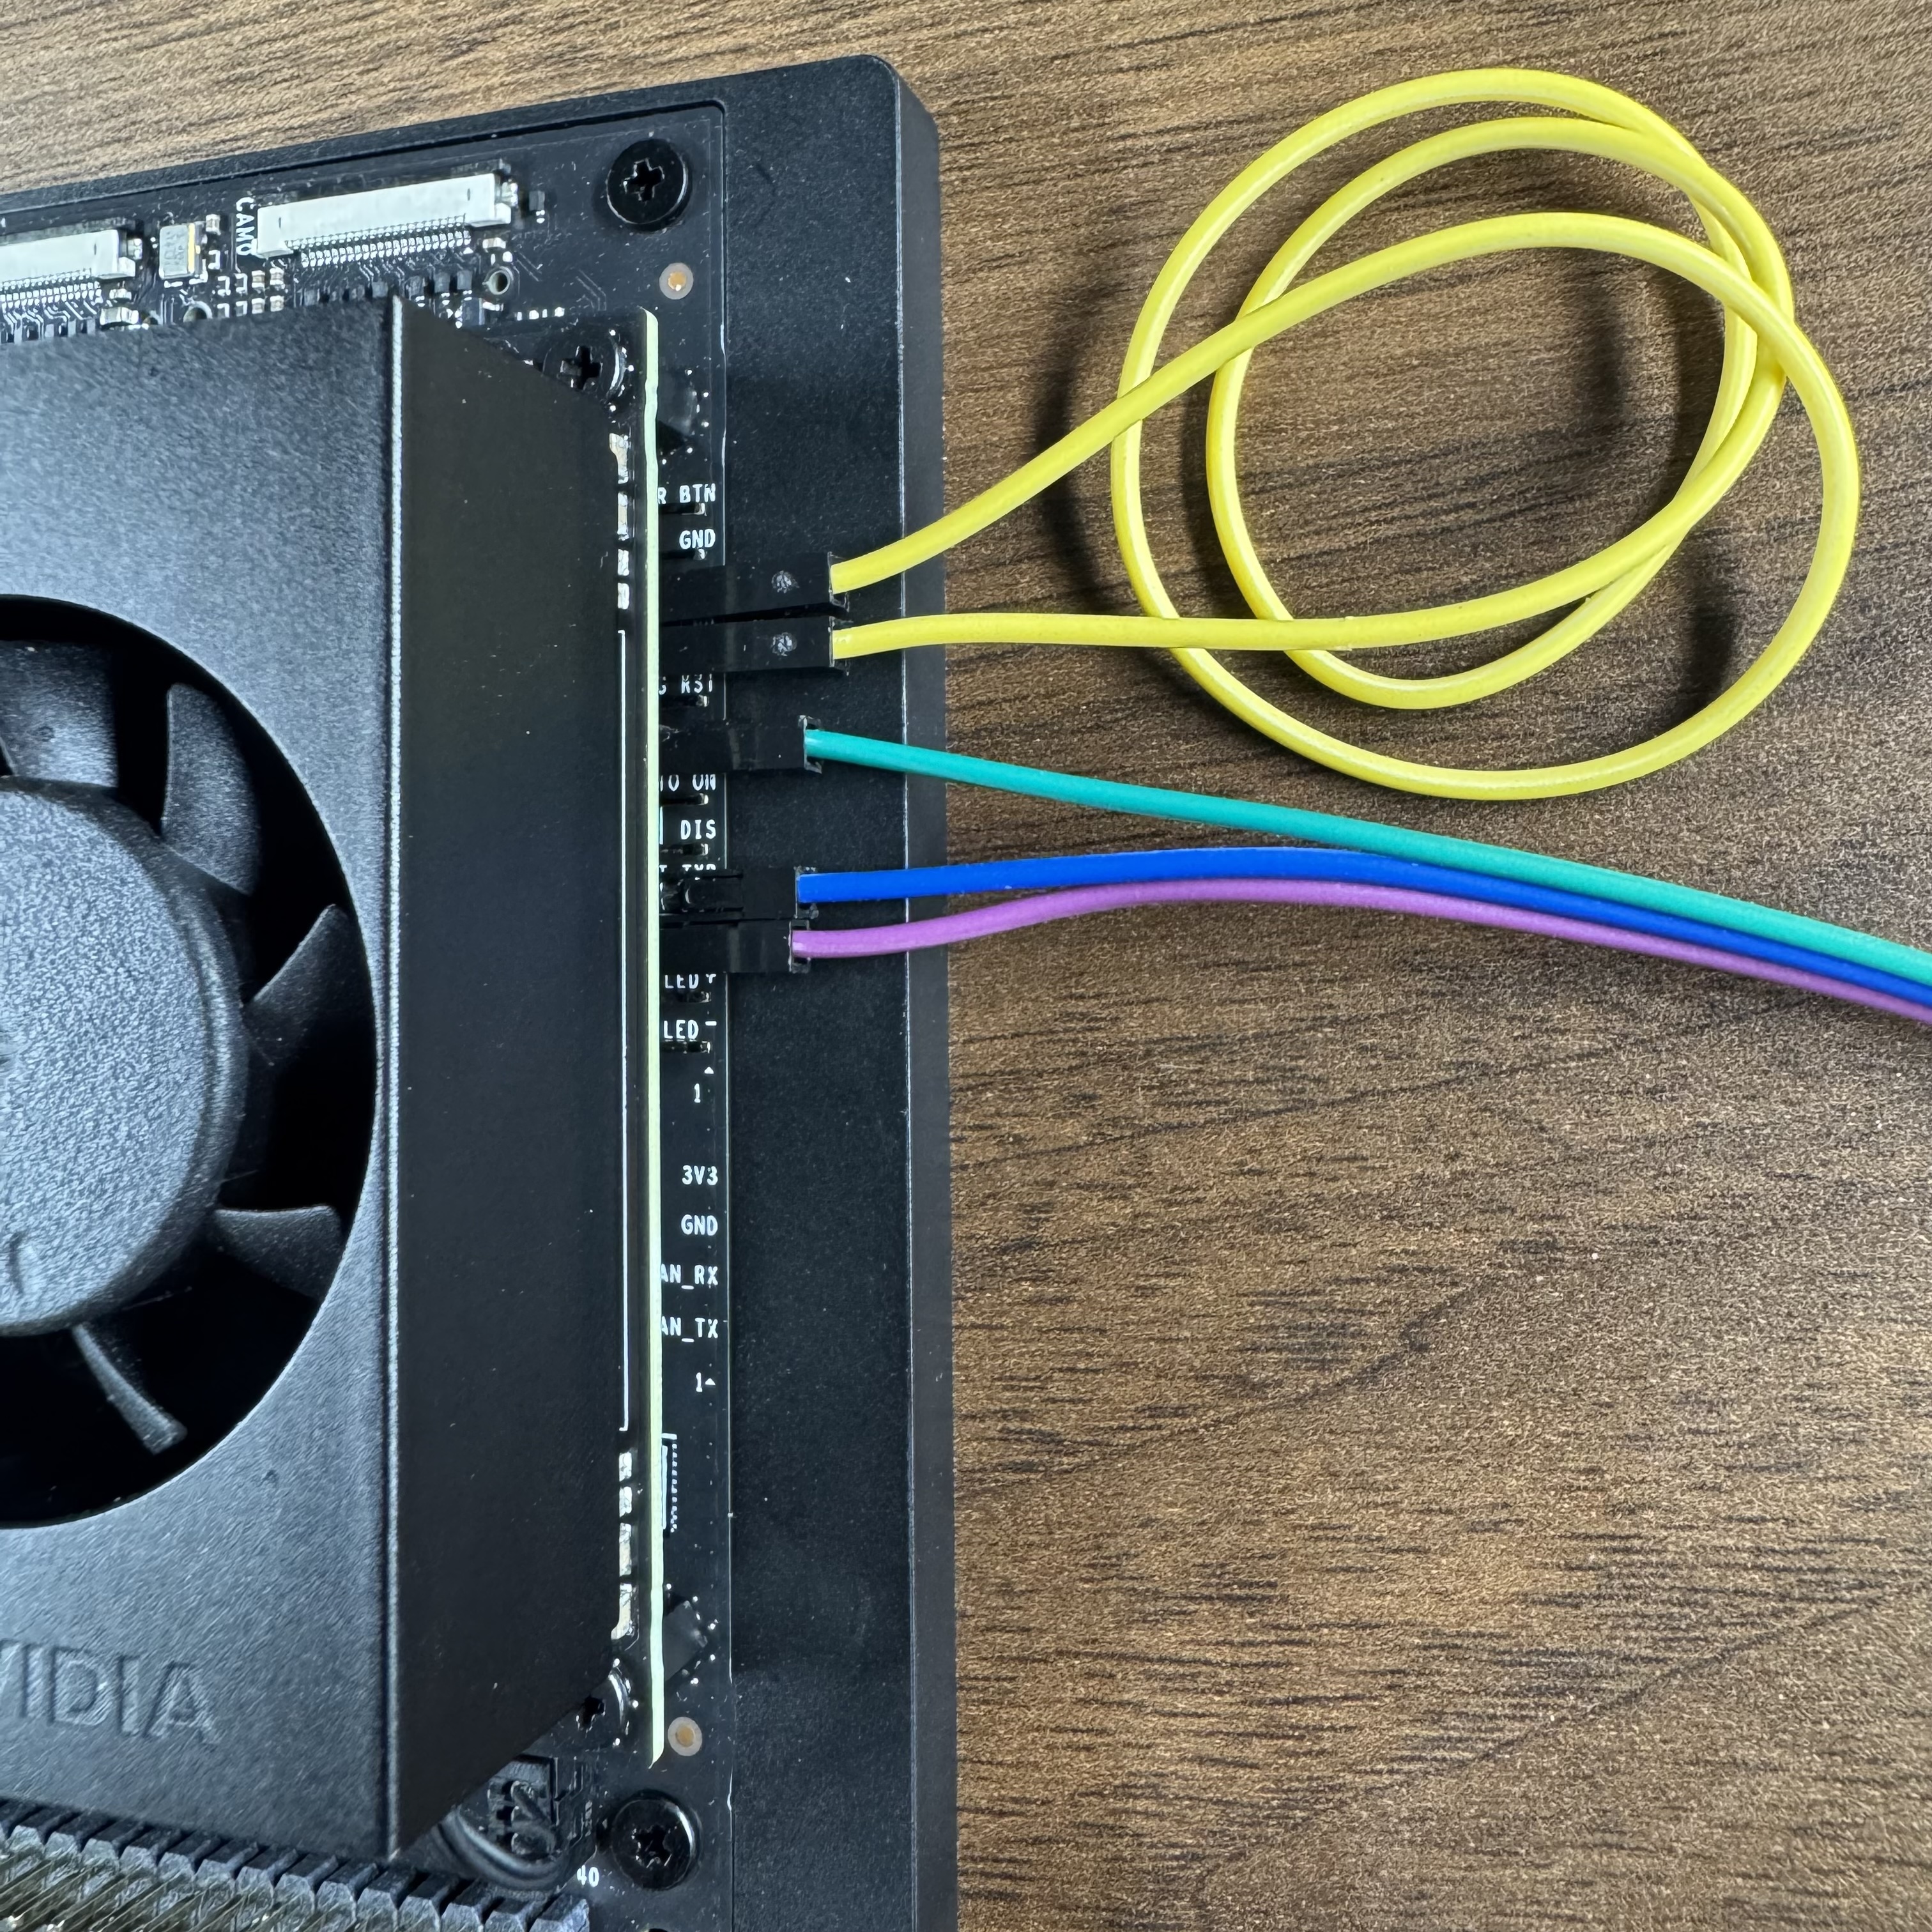
Connect GPIO
Locate the horizontal GPIO pins beneath the module on the topside of the carrier board:
- Boot into recovery mode:
-
yellow: short
FC RECtoGND
-
yellow: short
- Connect your serial console adapter to the target device:
-
green:
GNDto adapter UART GND -
blue:
UART TXDto adapter UART RX -
violet:
UART RXDto adapter UART TX
-
green:
Connect to the serial console with a program like tio:
tio -b 115200 /dev/ttyUSB0
[03:26:54.521] tio 3.9
[03:26:54.521] Press ctrl-t q to quit
[03:26:54.521] Warning: Could not open /dev/ttyUSB0 (No such file or directory)
[03:26:54.521] Waiting for tty device..
Replace /dev/ttyUSB0 with the appropriate device path for your serial adapter.
Connect USB
Connect the target device USB C to a host machine USB.
Verify the target device is detected via USB only after having powered it, for example:
lsusb
Bus 001 Device 001: ID 1d6b:0002 Linux Foundation 2.0 root hub
Bus 001 Device 035: ID 0403:6001 Future Technology Devices International, Ltd FT232 Serial (UART) IC
Bus 002 Device 060: ID 0955:7523 NVIDIA Corp. APX
The NVIDIA entry in the list of USB devices showing up after powering the device indicates it is connected to the host machine.
Create project
Create the project directory and install dependencies.
avocado init --target jetson-orin-nano-devkit jetson-orin-nano-devkit && cd jetson-orin-nano-devkit
avocado install --force
Provision
Build the project and execute the provisioning procedure. This will build the system image and flash it to your target hardware.
avocado build
avocado provision -r dev --profile tegraflash
The procedure will advance through a few steps:
== Step 1: Signing binaries at 2025-10-13T12:18:56+00:00 ==
...
== Step 2: Boot Jetson via RCM at 2025-10-13T12:19:27+00:00 ==
...
== Step 3: Sending flash sequence commands at 2025-10-13T12:19:41+00:00 ==
...
During step 3, you will need to disconnect and reconnect the USB C cable from the target device.
Wait till you see:
The Jetson device is waiting for USB disconnect to proceed.
Please manually disconnect and reconnect the USB cable now.

Steps:
  1. Unplug the USB-C cable from the Jetson device
  2. Wait 2-3 seconds
  3. Plug the USB-C cable back in

Press Enter after reconnecting the USB cable...
Then do as it instructs, which will advance to step 4:
== Step 4: Writing partitions on external storage device at 2025-10-13T12:23:11+00:00 ==
Wait until you see:
== Step 5: Waiting for final status from device at 2025-10-13T12:27:40+00:00 ==
Waiting for USB storage device flashpkg from 52e6d9b7.......
Once you see the above, perform the same reconnection procedure:
- Unplug the USB-C cable from the Jetson device
- Wait 2-3 seconds
- Plug the USB-C cable back in
This will allow the provisioning process to complete:
[SUCCESS] Successfully provisioned runtime 'dev'
- Remove power from the target device
- Remove the jumper shorting
FC RECtoGNDto prevent the device from booting into recovery mode - Remove the USB C cable from the target device
- Leave the serial console adapter connected
Run
Apply power to the device. The device will boot with the provisioned system. The root user is passwordless in the dev runtime used by this guide.