Getting started
This guide provides a technical introduction to the Peridio Core Platform, designed for developers evaluating the system or starting an integration.
The Peridio Core Platform is a CI/CD platform for embedded devices. It supports multiple device types and integration strategies, providing high-level tools and control to enable safe collaboration for software built for embedded or distributed environments. Additionally, for embedded Linux environments, the Peridio Core Platform provides the ability to remotely connect to and access remote systems via WireGuard.
FAQs
- How long does the setup process typically take? The initial setup process described in this guide typically takes less than 20 minutes for a new user, including account creation, CLI setup, and performing your first simulated update.
- Does this guide cover device integration? Not at this time. This guide covers cloud-only integration and how to issue simulated device updates. This approach is most commonly leveraged in API-only utilization of the Peridio platform.
- Are all these steps required for every update? Absolutely not. This guide exists to introduce you to the core concepts of Peridio. In real-world use, 90% of this is automated leveraging just a few CLI commands. If you're interested in how to "speed run" file upload to delivery, we suggest you look into leveraging "bundle overrides".
- How does Peridio ensure secure updates? Peridio uses code signing with a key pair system where your private key signs the firmware and devices verify authenticity using the public key before accepting updates.
Guide overview
This guide will walk you through the process of readying a firmware for release, and simulating final the update through leveraging our CLI. In the interest of simplicity, we are going to make a few assumptions, but feel free to detour at any point and explore the broader product and platform.
In this guide, we'll walk through the following steps:
- Account creation
- Initialize a product, cohort, and device
- CLI setup
- Creating and registering signing keys
- Creating binaries
- Making binaries available to our device
- Performing a simulated update
Account creation
In order to get started with Peridio, you will first need an active account associated to an organization. In order to get an account, please submit the following form and await confirmation. Soon after, you'll receive an email from our team confirming creation of your account and an invitation to the organization in your email domain.
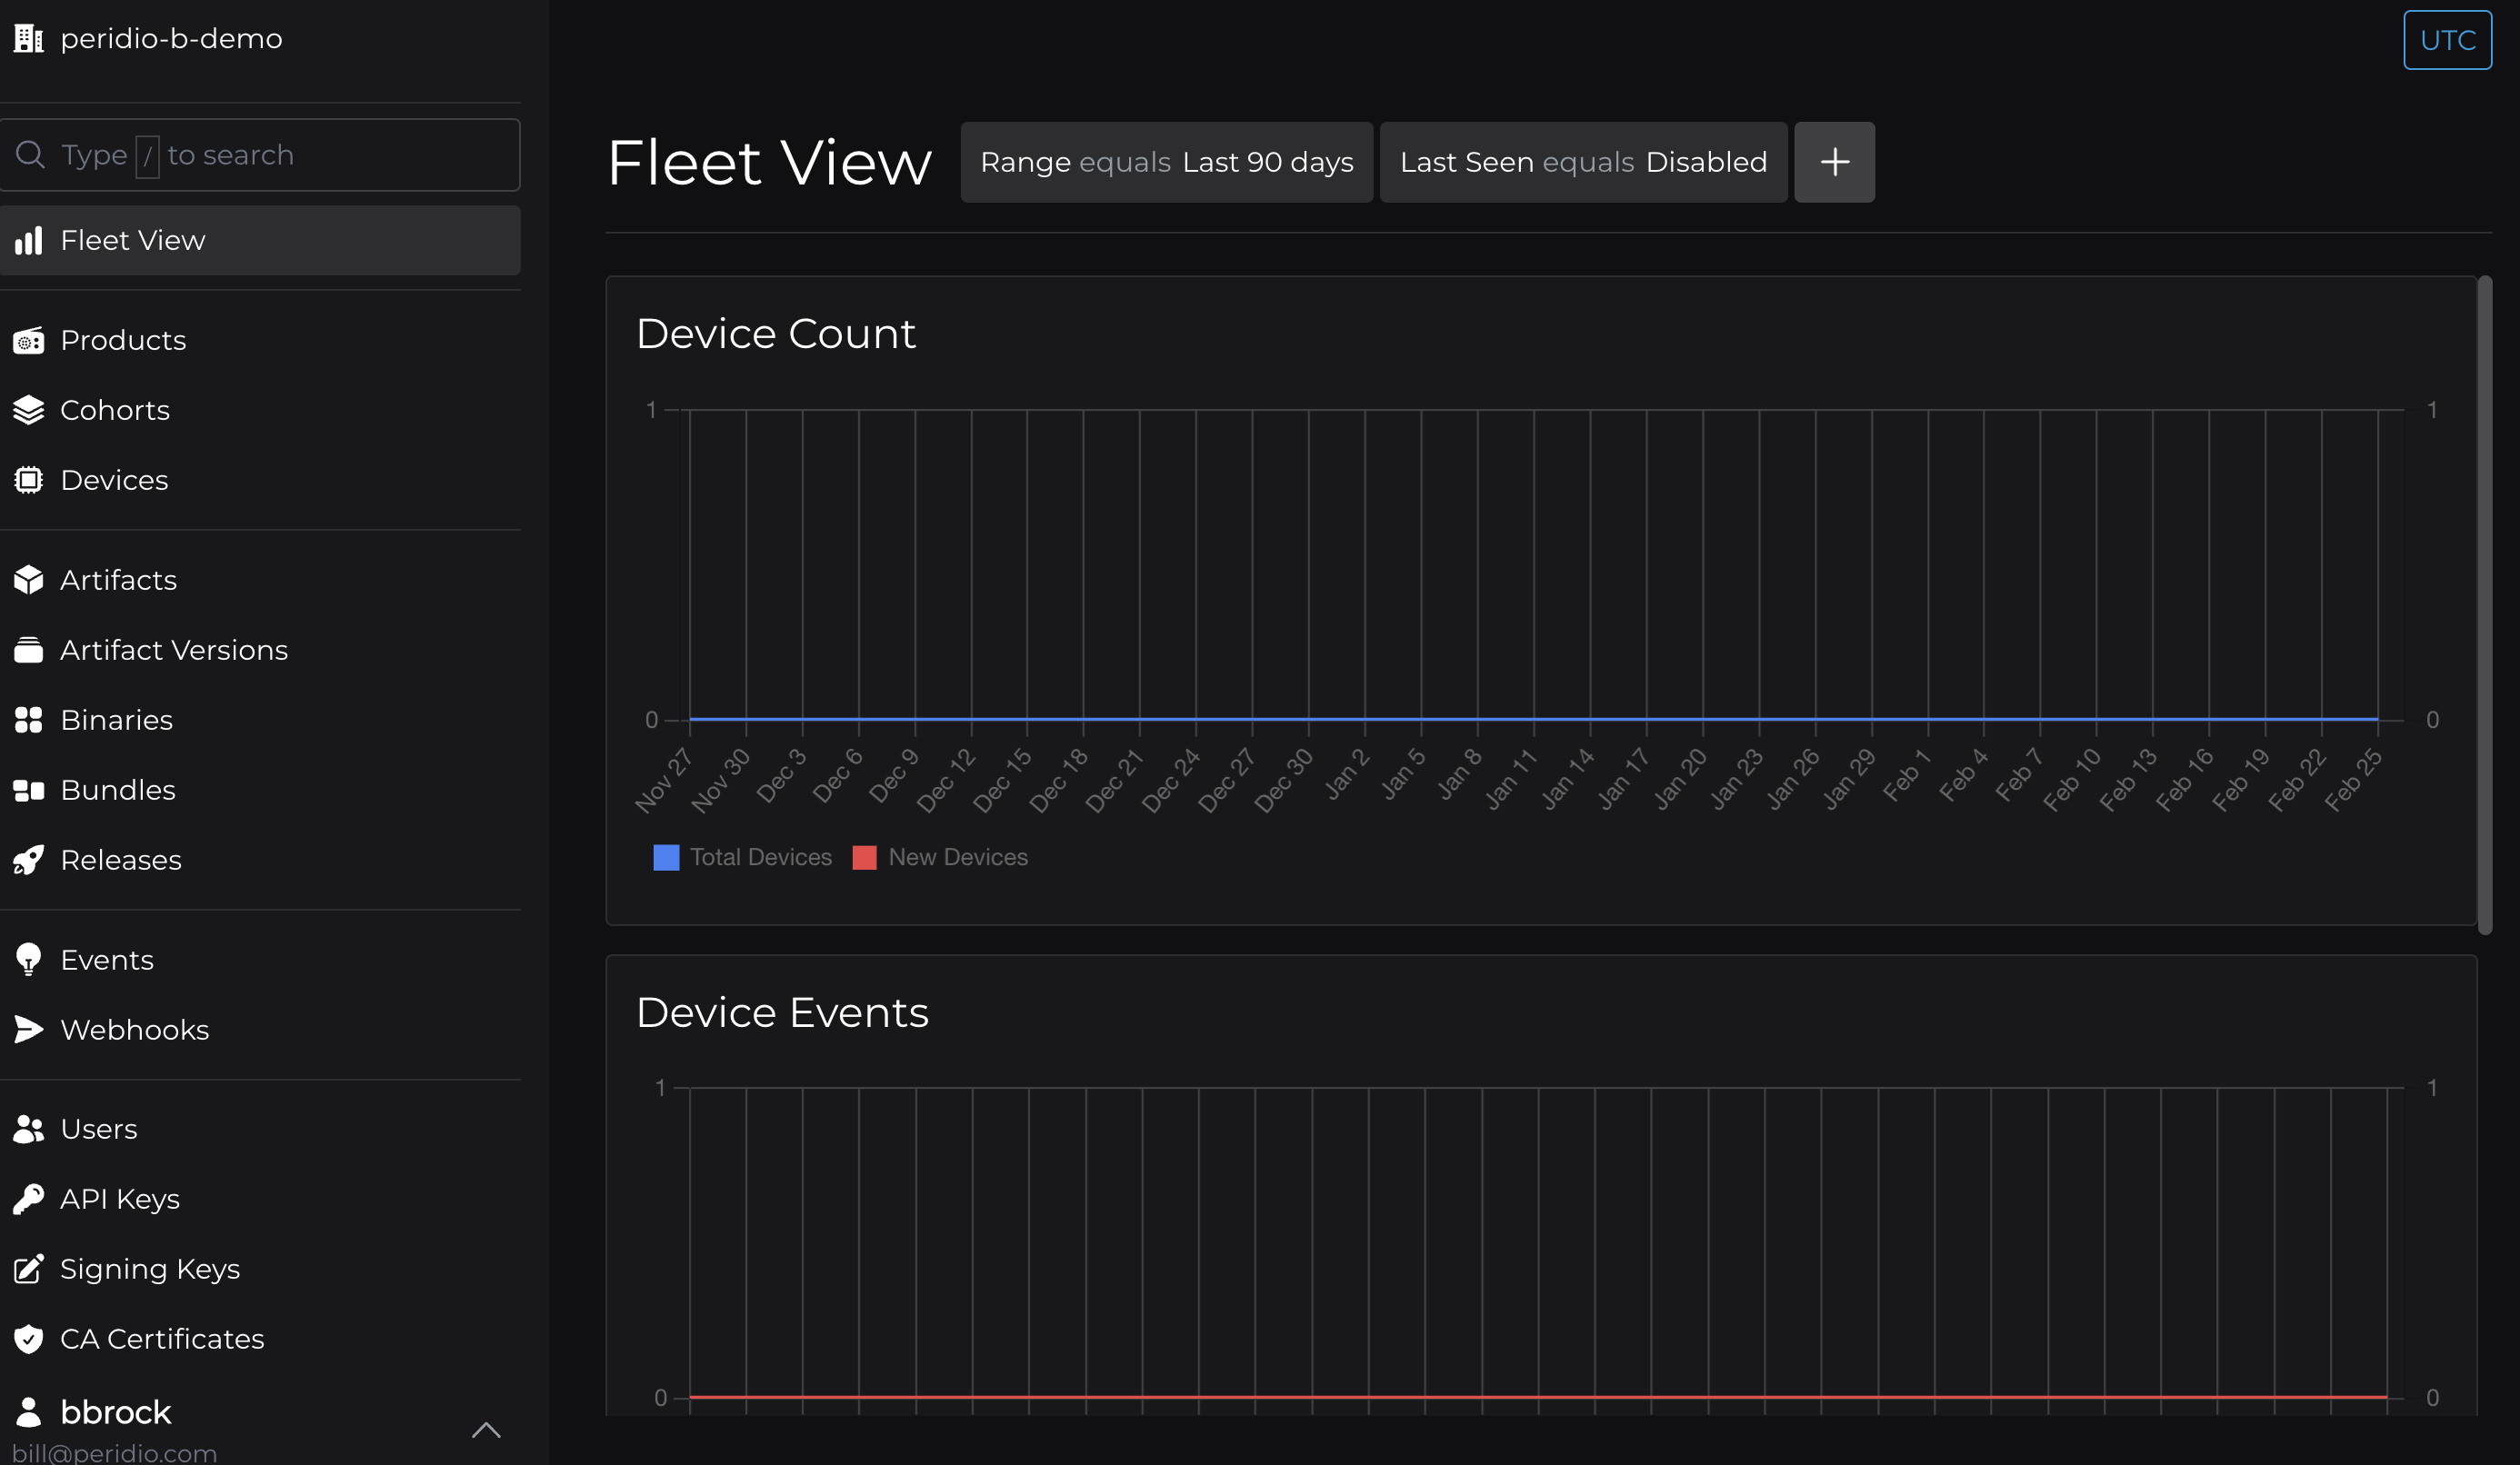
After accepting the invitation and logging in — you'll see your fleet with 0 initial devices. Congratulations!
Creating a product, device, and cohort
Creating a product
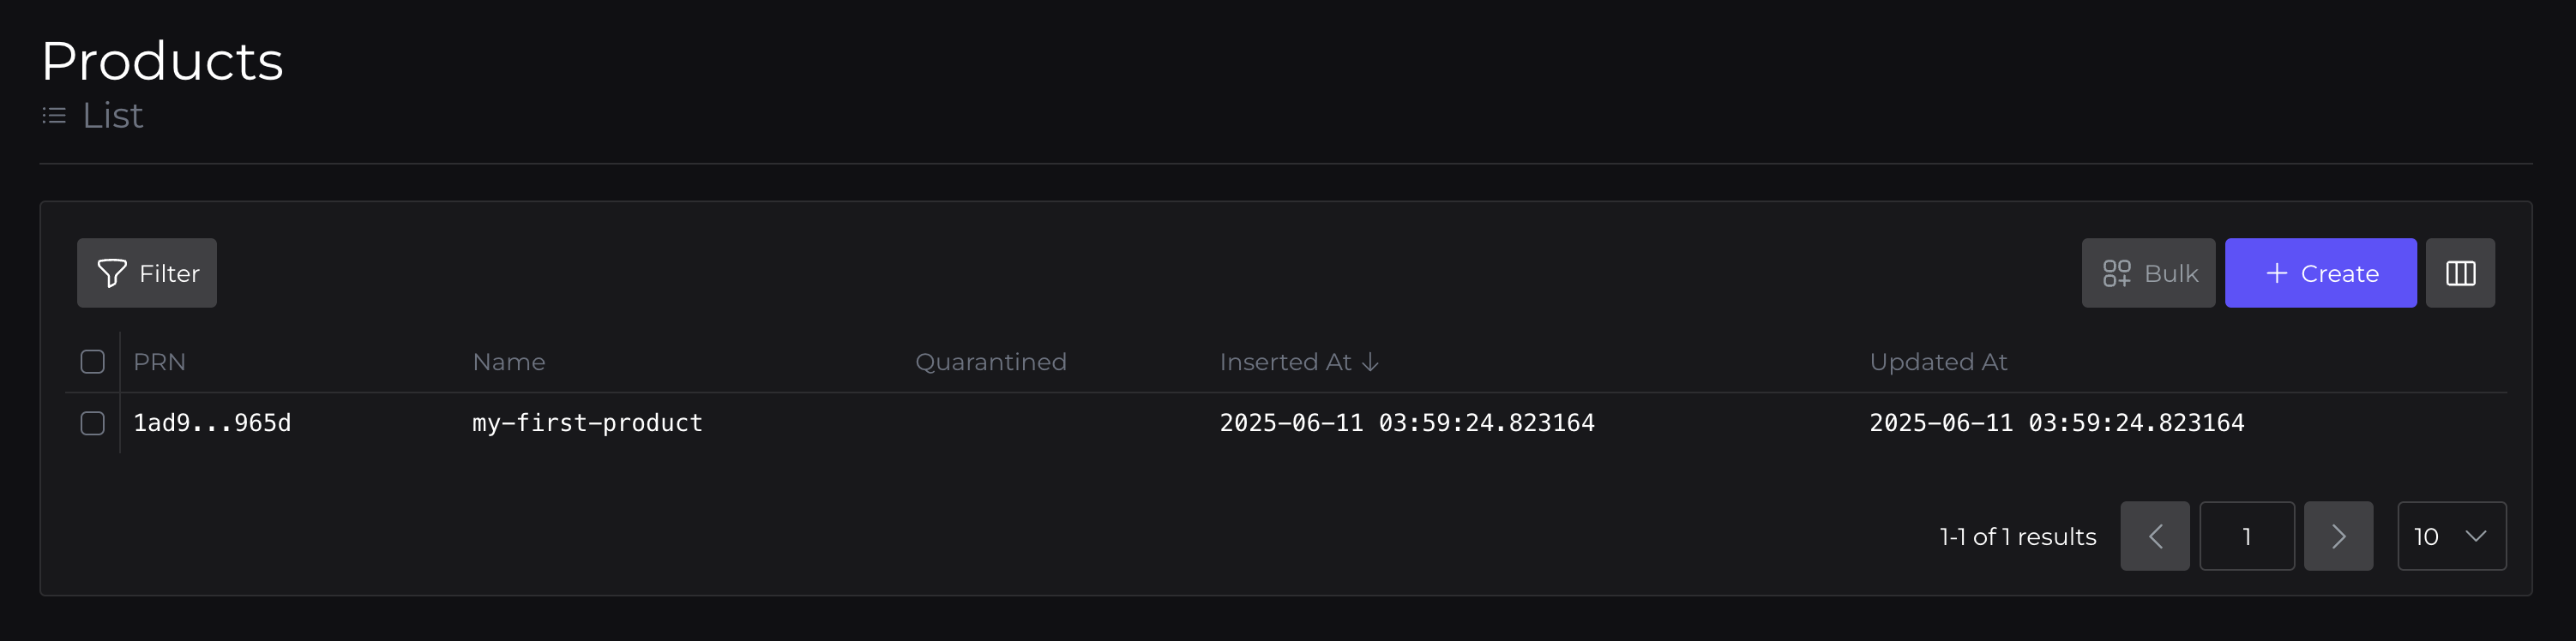
Navigate to the Products tab, and create "create product". You'll need to enter the product name and click "save".
Following that, you'll be able to see your first product listed in the products table.
Similarly, you'll need to create
- a cohort
- a device
Creating a cohort
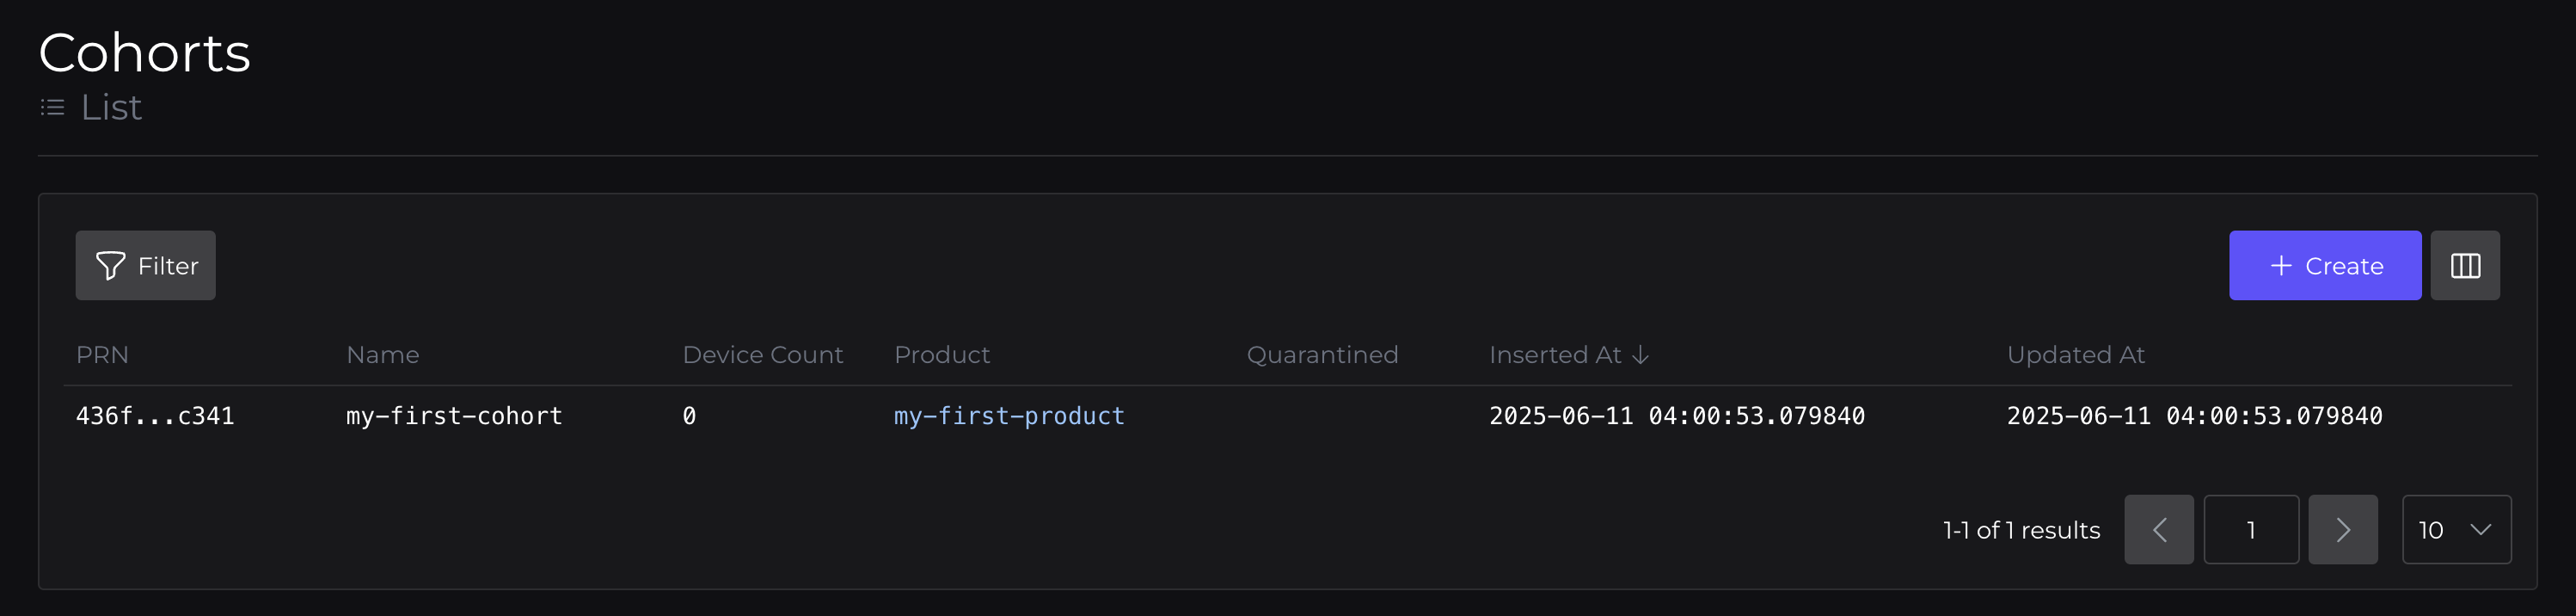
Now, navigate to the Cohorts tab, and click "create cohort". You'll need to enter the cohort name, description, and associate that cohort to a product.
Now click "save". You can see that cohort in the cohorts table.
Creating a device
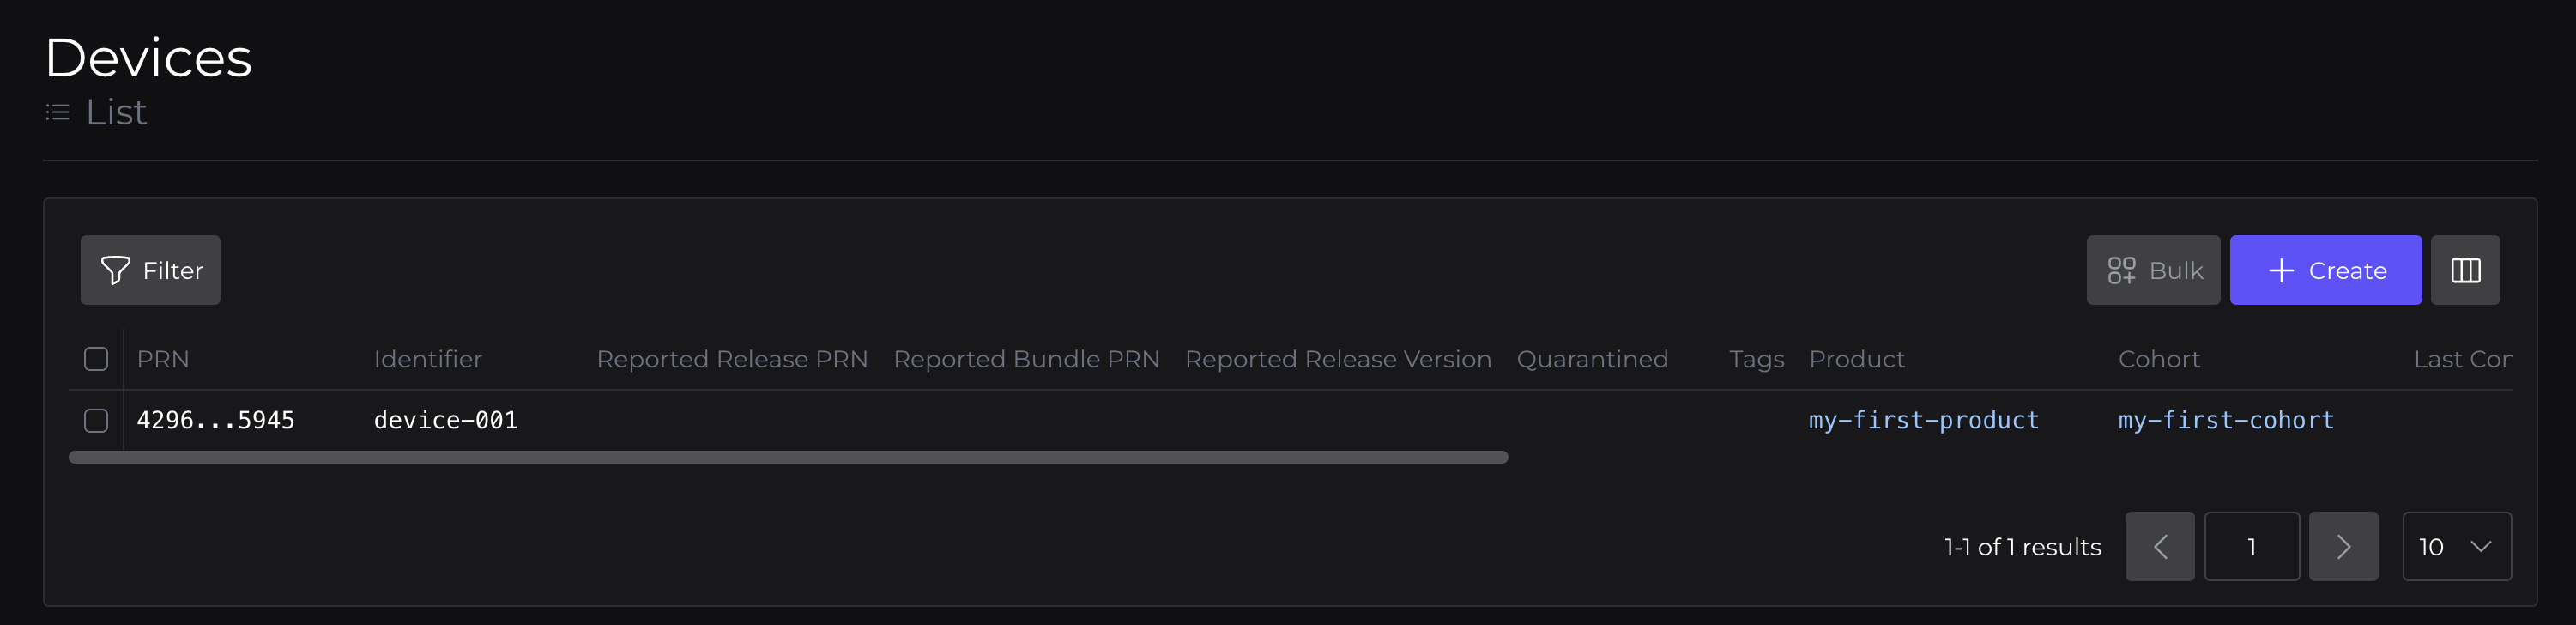
Last, let's navigate to the Devices tab and repeat this process. We'll want this device to be related to this product, cohort, and optionally, you can specify a target.
So, at this point we should have the following hierarchy:
Product: my-first-product
Cohort: my-first-cohort
Device: device-001
Ok, now that we have a device, we're going to want to upload software to the platform for distribution. Given that this requires code-signing, the most efficient way to perform these actions are from the CLI.
So, lets get that set up.
CLI setup
The Peridio CLI is simply a wrapper around our RESTful API. Full documentation for the CLI is available here.
To get started, we'll need to
- download the CLI
- configure our preferences and secrets
- and verify successful communication
Ok, lets get into it.
Downloading the CLI
Go ahead and download the peridio cli from our releases page on Github here.
Generating an API key for the CLI
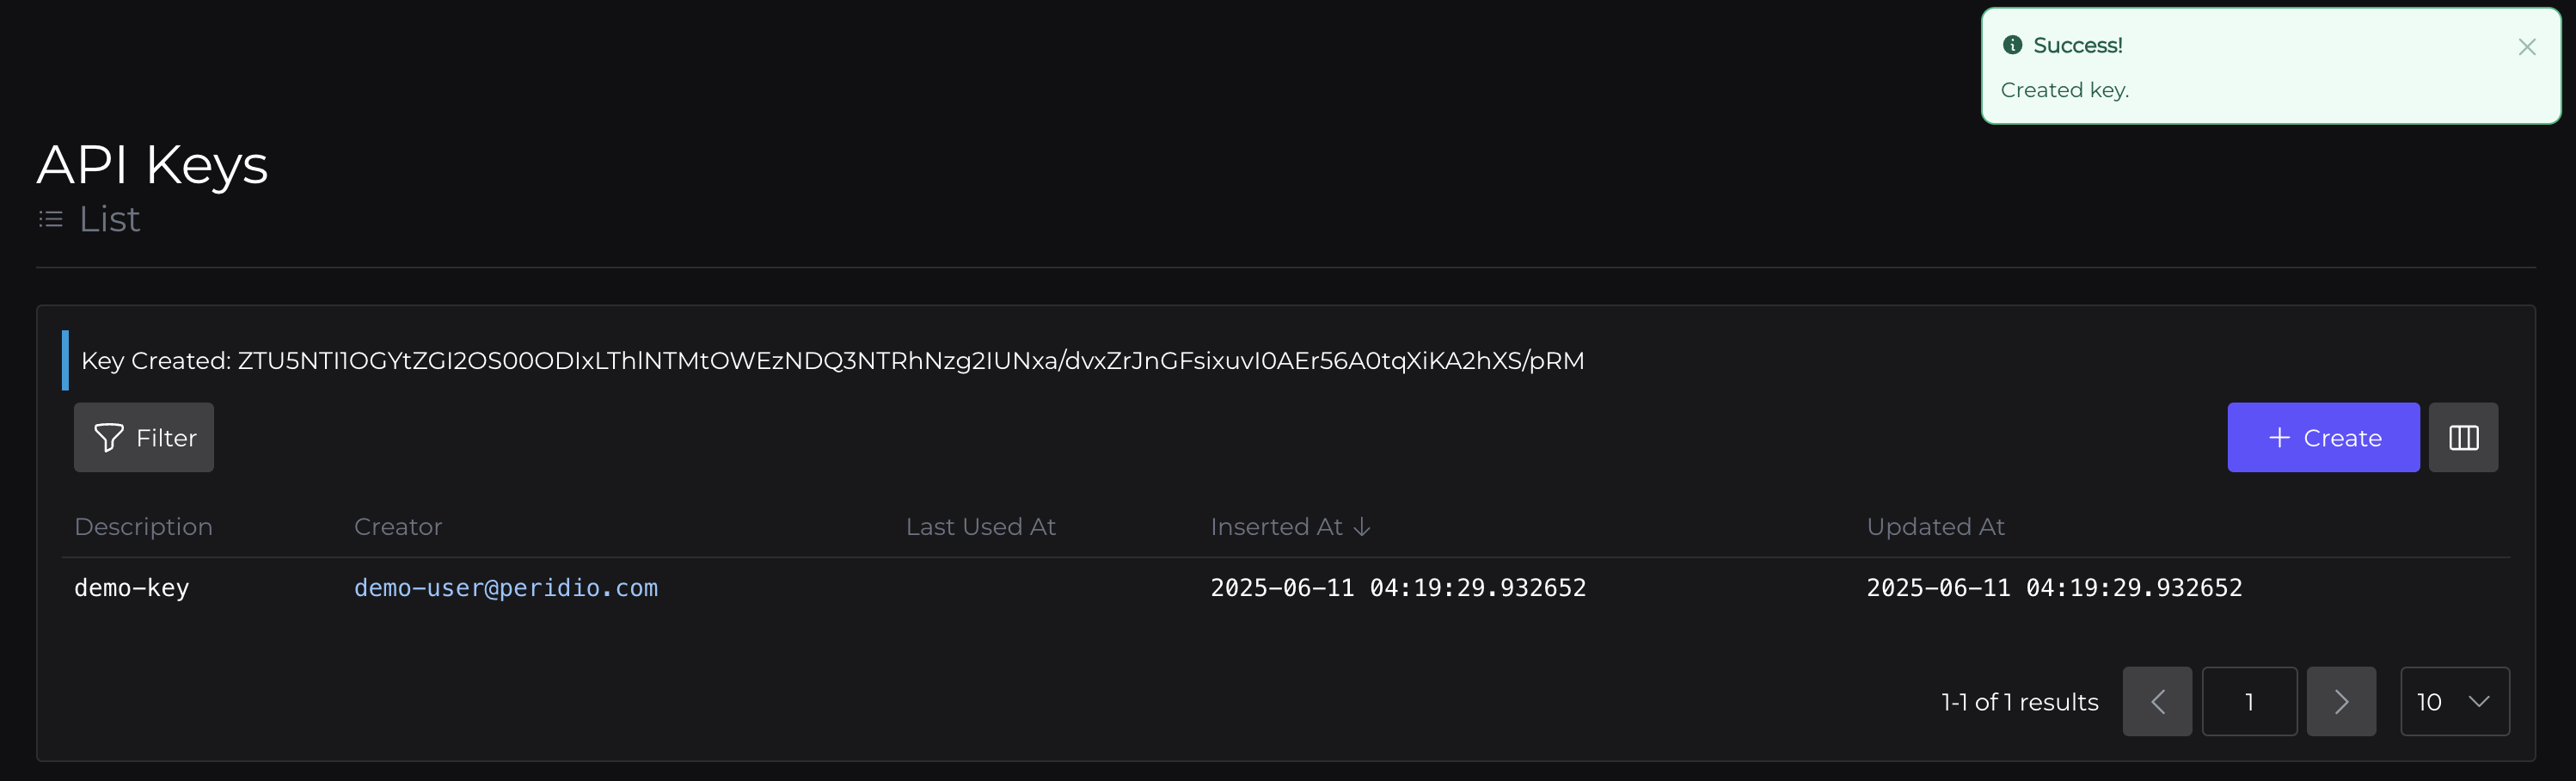
We need to get an API key to authenticate with the Peridio platform. Head to console.peridio.com, and select API Keys from the left hand sidebar.
Now create a key, and copy that down. If you accidentally refresh and lose the value, just create another, you can have as many as you like (and they're easy to delete).
We'll need this key when configuring our first Peridio CLI profile next.
Configuring the CLI
The Peridio CLI has a convenience command for configuring new profiles: peridio config profiles create (docs here).
You pass a name for the profile, which can be whatever is convenient for you. By default, the create command will prompt you interactively for your API key. Alternatively you can pass it in as an argument via the --api-key option.
peridio config profiles create --name peridio-demo
✔ API key · ********
success: Profile 'peridio-demo' configured successfully at /Users/demo-user/Library/Application\ Support/peridio.
Use with: peridio -p peridio-demo [command]
This is all we need to configure the CLI to communicate with the Peridio platform.
The Peridio CLI config supports multiple profiles. We strongly encourage you to pass your --profile to all CLI commands, as it lets you avoid passing your API key to every command.
If you want to see where this information is stored, you can see it in these two files. Note: This assumes a macOS operating system. For other platforms, see here: CLI Configuration Files.
cat $HOME/Library/Application\ Support/peridio/config.json
{
  "version": 2,
  "profiles": {
    "peridio-demo": {
      "base_url": null,
      "ca_path": null
    }
  },
  "signing_key_pairs": {},
  "certificate_authorities": {}
}
cat $HOME/Library/Application\ Support/peridio/credentials.json
{
  "peridio-demo": {
    "api_key": "your-key-here"
  }
}
Let's verify our CLI configuration by making a test request.
Verifying the CLI configuration
We'll do this by running the peridio users me command, but specify the profile we just created by passing --profile flag into the CLI.
This is always the first argument supplied, following peridio. For example:
peridio --profile peridio-demo users me
Response:
{
  "data": {
    "email": "demo-user@peridio.com",
    "username": "demo-user"
  }
}
If you see data, you're in business.
Creating and registering signing keys
Code signing adds a digital signature to your firmware, proving who created it and confirming it hasn't been tampered with. For embedded devices managed through Peridio, this verification step prevents unauthorized code from being installed, protecting your devices from potential security breaches. The process uses a key pair system where your private key signs the code and devices use the matching public key to verify authenticity before accepting updates.
Creating and cloud-registering signing keys
We will leverage the Peridio CLI again to generate our signing keys, upload them to the Peridio platform, and update our local CLI config to use them when uploading binaries.
This CLI command will create a signing key pair, using the Ed25519 algorithm, storing them in the current directory, then uploading them to the Peridio platform under the name demo key, then updating our local CLI peridio-demo profile config to use these signing keys for future binary creation commands.
The --out directory is where your keys will be stored, and this path will be written into our config. Consider this location before executing the command. It can always be updated within the config.json file.
peridio --profile peridio-demo signing-keys create \
  --name 'demo key' \
  --algorithm Ed25519 \
  --config peridio-demo \
  --out .
Response:
{
  "signing_key": {
    "value": "DIU8Zhf20Gr4n6vzDxCG2eupglynQ1Q6j19UKA4Mf88=",
    "inserted_at": "2025-06-10T20:52:35.235291Z",
    "name": "demo key",
    "organization_prn": "prn:1:8ced1740-7fbf-407e-9d6e-afec9399cc41",
    "prn": "prn:1:8ced1740-7fbf-407e-9d6e-afec9399cc41:signing_key:18d20763-bc23-40b0-abe5-702ea134be53",
    "updated_at": "2025-06-10T20:52:35.235291Z"
  }
}
We can check our local CLI configuration, and see that the signing_key_pairs section has been updated with a peridio-demo profile entry pointing to the location of our private signing key file.
cat $HOME/Library/Application\ Support/peridio/config.json
Response:
{
  "version": 2,
  "profiles": {
    "peridio-demo": {
      "base_url": null,
      "ca_path": null
    }
  },
  "signing_key_pairs": {
    "peridio-demo": {
      "signing_key_prn": "prn:1:8ced1740-7fbf-407e-9d6e-afec9399cc41:signing_key:18d20763-bc23-40b0-abe5-702ea134be53",
      "signing_key_private_path": "/Users/demo-user/my-signing-keys/private.pem"
    }
  },
  "certificate_authorities": {}
}
For a more manual process of creating signing keys, see our guide on creating signing keys here.
Check in
- Account creation
- Initialize a product & device
- Configuring the development environment
- Creating and registering our signing keys
- Creating a binary
- Making our binary available to our device
- Performing a simulated update
We're now on the home stretch — all that's remaining is to get our assets into peridio, and then perform a simulated device update.
Creating a binary
Similar to the Product, Cohort and Device hierarchy, Artifacts, Versions and Binaries have a similar relationship. Given that we're already using the CLI, we're going to quickly create what we need with just a few commands.
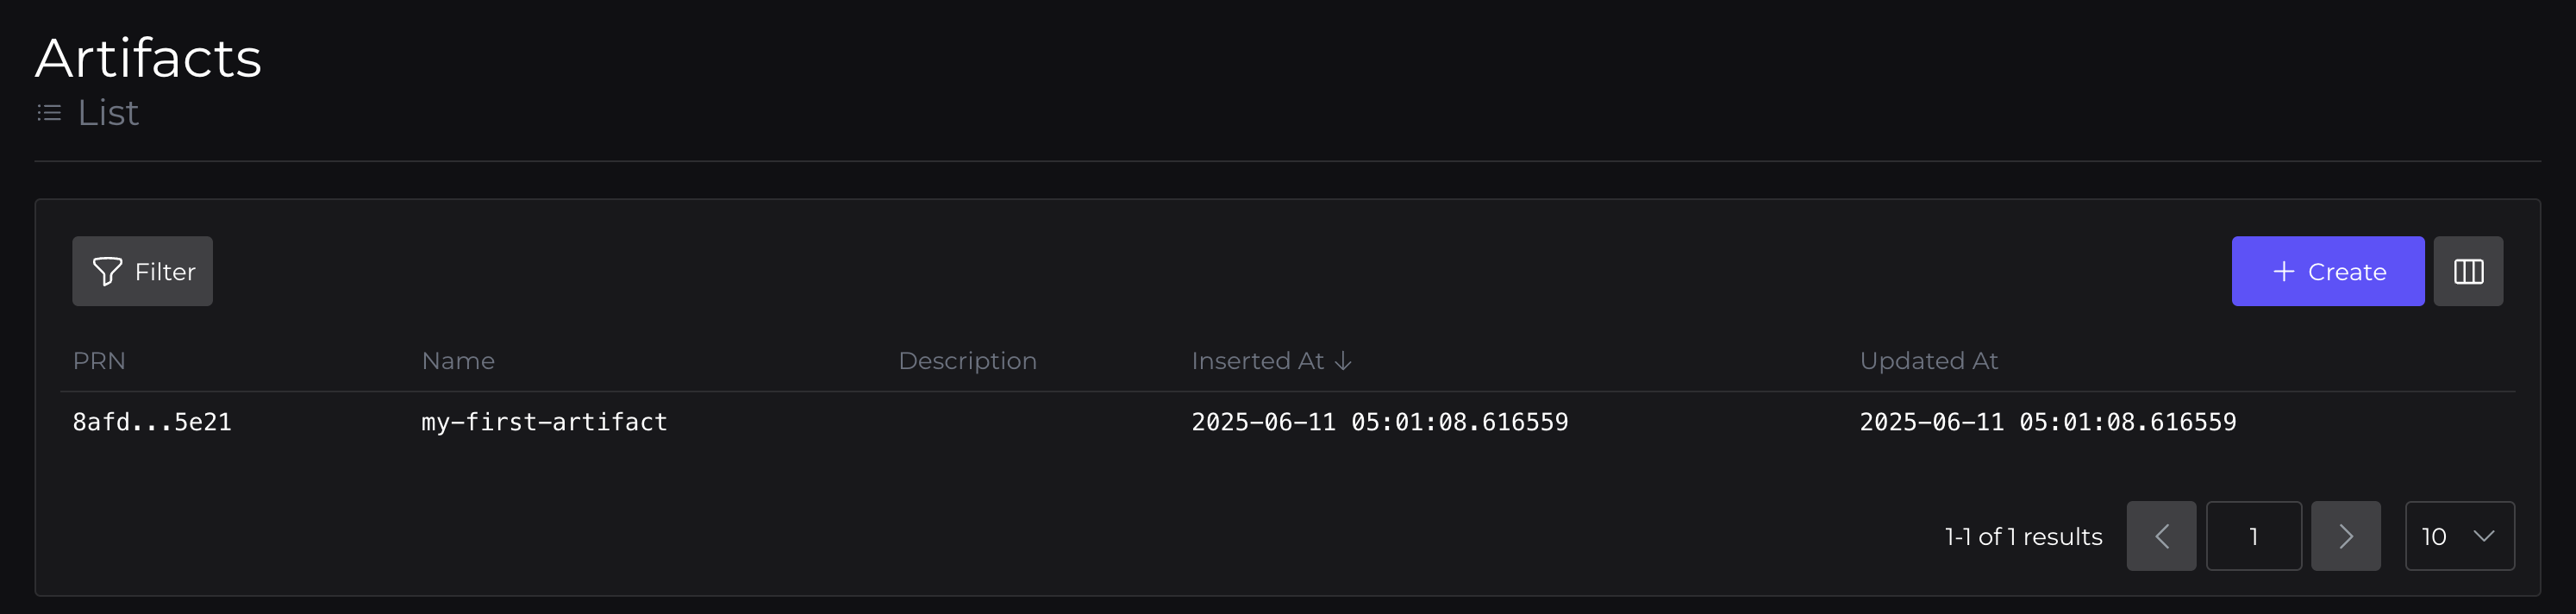
Create an artifact
peridio --profile peridio-demo artifacts create \
  --name my-first-artifact
Response:
{
  "artifact": {
    "custom_metadata": null,
    "description": null,
    "inserted_at": "2025-06-11T05:01:08.616559Z",
    "name": "my-first-artifact",
    "organization_prn": "prn:1:8ced1740-7fbf-407e-9d6e-afec9399cc41",
    "prn": "prn:1:8ced1740-7fbf-407e-9d6e-afec9399cc41:artifact:8afd6899-fdee-4f39-b2f8-cdcb4c945e21",
    "updated_at": "2025-06-11T05:01:08.616559Z"
  }
}
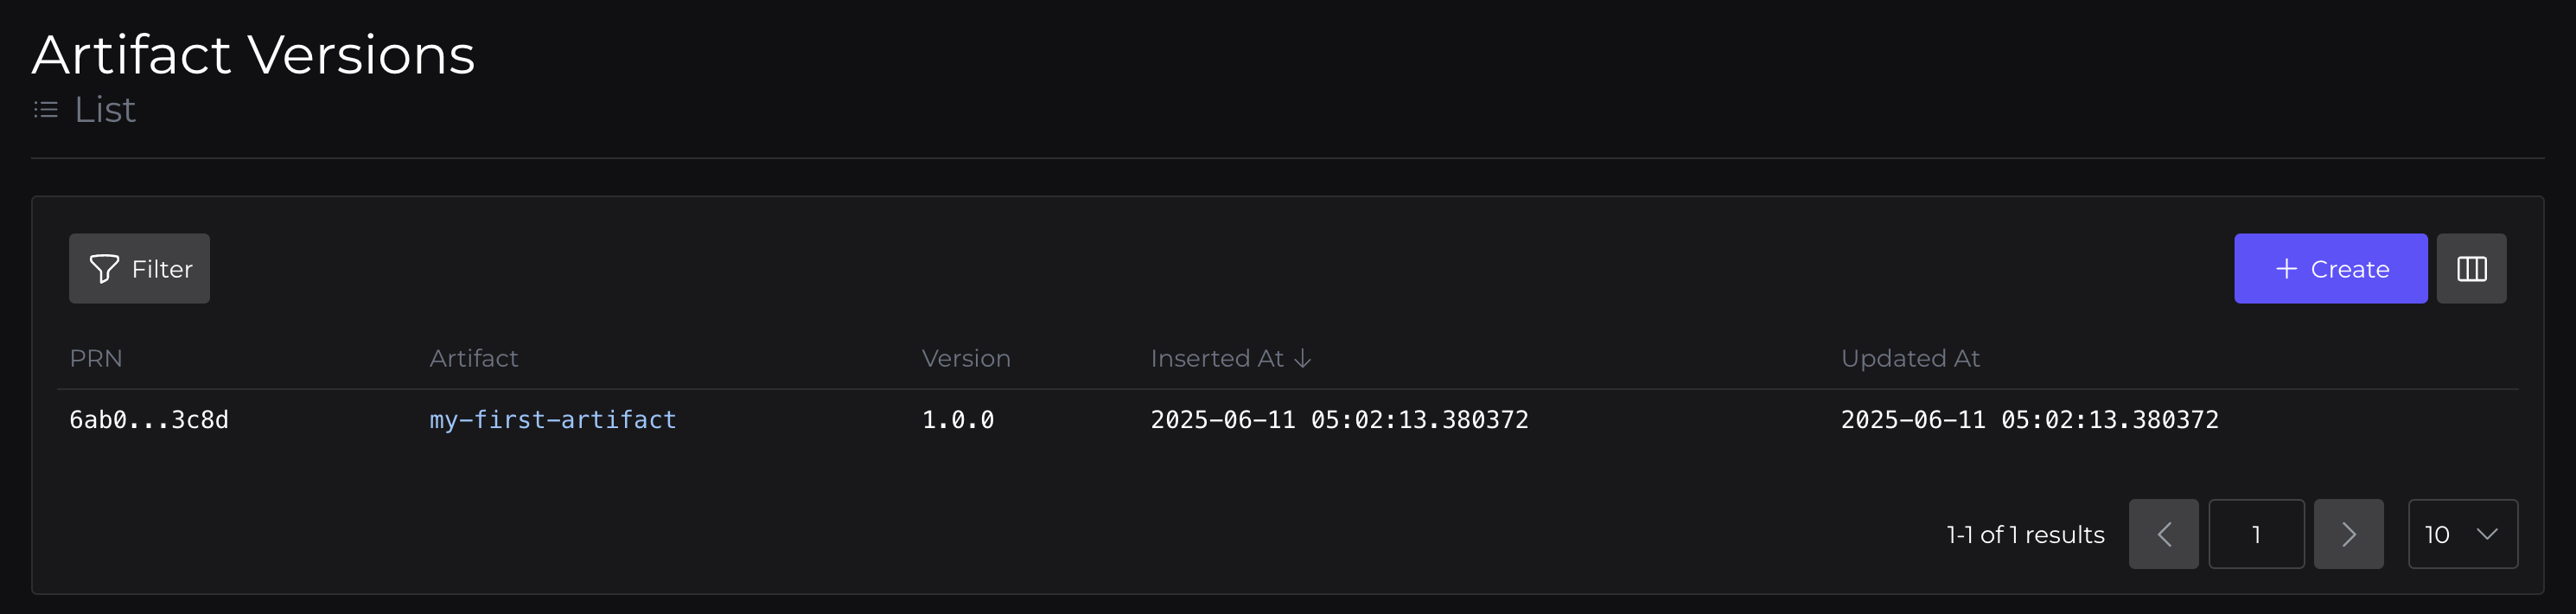
Create a version
Taking the prn from the artifact, we can now create our 1.0.0 version.
peridio --profile peridio-demo artifact-versions create \
  --version 1.0.0 \
  --artifact-prn prn:1:8ced1740-7fbf-407e-9d6e-afec9399cc41:artifact:8afd6899-fdee-4f39-b2f8-cdcb4c945e21
Response:
{
  "artifact_version": {
    "artifact_prn": "prn:1:8ced1740-7fbf-407e-9d6e-afec9399cc41:artifact:8afd6899-fdee-4f39-b2f8-cdcb4c945e21",
    "custom_metadata": null,
    "description": null,
    "inserted_at": "2025-06-11T05:02:13.380372Z",
    "organization_prn": "prn:1:8ced1740-7fbf-407e-9d6e-afec9399cc41",
    "prn": "prn:1:8ced1740-7fbf-407e-9d6e-afec9399cc41:artifact_version:6ab0d328-a6fe-49b8-8659-cd927b6f3c8d",
    "version": "1.0.0",
    "updated_at": "2025-06-11T05:02:13.380372Z"
  }
}
Creating and staging a binary
Lets create a file
touch my-first-binary.fw
echo "Hello, Binary" >> my-first-binary.fw
We can now sign, upload, and even make our binary available directly to our device via a bundle override -- all in one command.
We will provide a few key pieces of information to the binaries create command:
target: a human-friendly identifier for platform/architecture (does NOT impact device update resolution)content-path: the location of the binary we are uploadingsigning-key-pair: the signing key we are referencing in ourconfig.jsonartifact-version-prn: the artifact version this binary will be associated withdevice-prn: the device that this binary will be available to, via a bundle override
By providing the optional --device-prn arg, this command will perform three additional convenience operations after creating the binary:
- create a bundle, specifically for our newly-created binary
- create a bundle override, that serves our newly-created bundle
- assigning our device to this newly-created bundle override
This sets up your device to automatically receive this new binary the next time it checks for an update.
peridio --profile peridio-demo binaries create \
  --target any \
  --content-path my-first-binary.fw \
  --signing-key-pair peridio-demo \
  --artifact-version-prn prn:1:8ced1740-7fbf-407e-9d6e-afec9399cc41:artifact_version:6ab0d328-a6fe-49b8-8659-cd927b6f3c8d \
  --device-prn prn:1:8ced1740-7fbf-407e-9d6e-afec9399cc41:device:429698bf-6ac2-40de-bac9-9969d9305945
Progress Ouptut:
Hashing binary...
Creating binary...
Evaluating binary parts...
Creating binary parts and uploading...
Validating Upload
Updating binary to hashable...
Updating binary to hashing...
Waiting for cloud hashing...
Signing binary...
Fetching or creating bundle for binary...
Using bundle prn:1:8ced1740-7fbf-407e-9d6e-afec9399cc41:bundle:482b9931-1444-4e9d-b40e-36076fc267b0
Creating bundle override...
Created bundle override prn:1:8ced1740-7fbf-407e-9d6e-afec9399cc41:bundle_override:2288ecac-38b9-4f7f-b098-ed3cddf4c1e7
Adding device to bundle override...
Added device prn:1:8ced1740-7fbf-407e-9d6e-afec9399cc41:device:429698bf-6ac2-40de-bac9-9969d9305945 to bundle override prn:1:8ced1740-7fbf-407e-9d6e-afec9399cc41:bundle_override:2288ecac-38b9-4f7f-b098-ed3cddf4c1e7
Response:
{
  "binary": {
    "artifact_version_prn": "prn:1:8ced1740-7fbf-407e-9d6e-afec9399cc41:artifact_version:6ab0d328-a6fe-49b8-8659-cd927b6f3c8d",
    "custom_metadata": null,
    "description": null,
    "hash": "403ccc806332775b59558608031ce2656bfee95b32229bdd9aed5aab433af55b",
    "organization_prn": "prn:1:8ced1740-7fbf-407e-9d6e-afec9399cc41",
    "prn": "prn:1:8ced1740-7fbf-407e-9d6e-afec9399cc41:binary:bf02c28a-56b3-411f-ba88-f92d947c53a1",
    "inserted_at": "2025-06-11T05:04:10.081728Z",
    "revision": 0,
    "signatures": [
      {
        "signature": "EA9C0A0078B1DE6F814BCDADB0E5D91D9E6E58C5882DFE689F0518DB135E0966DF9F52D6162A13201CB733EDBFD2F0B384D67BDD8B058D9E9AA24DF632365905",
        "signing_key_prn": "prn:1:8ced1740-7fbf-407e-9d6e-afec9399cc41:signing_key:18d20763-bc23-40b0-abe5-702ea134be53"
      }
    ],
    "size": 14,
    "state": "signed",
    "target": "any",
    "updated_at": "2025-06-11T05:04:32.587422Z"
  },
  "bundle": {
    "artifact_versions": [
      "prn:1:8ced1740-7fbf-407e-9d6e-afec9399cc41:artifact_version:6ab0d328-a6fe-49b8-8659-cd927b6f3c8d"
    ],
    "inserted_at": "2025-06-11T05:04:33.331001Z",
    "organization_prn": "prn:1:8ced1740-7fbf-407e-9d6e-afec9399cc41",
    "prn": "prn:1:8ced1740-7fbf-407e-9d6e-afec9399cc41:bundle:482b9931-1444-4e9d-b40e-36076fc267b0",
    "updated_at": "2025-06-11T05:04:33.331001Z",
    "name": "my-first-artifact@1.0.0/any"
  },
  "bundle_override": {
    "name": "my-first-artifact@1.0.0/any",
    "description": "Auto-created bundle override for bundle prn:1:8ced1740-7fbf-407e-9d6e-afec9399cc41:bundle:482b9931-1444-4e9d-b40e-36076fc267b0",
    "inserted_at": "2025-06-11T05:04:33.574262Z",
    "organization_prn": "prn:1:8ced1740-7fbf-407e-9d6e-afec9399cc41",
    "prn": "prn:1:8ced1740-7fbf-407e-9d6e-afec9399cc41:bundle_override:2288ecac-38b9-4f7f-b098-ed3cddf4c1e7",
    "updated_at": "2025-06-11T05:04:33.574262Z",
    "ends_at": null,
    "starts_at": "2025-06-11T05:04:33.342072Z",
    "bundle_prn": "prn:1:8ced1740-7fbf-407e-9d6e-afec9399cc41:bundle:482b9931-1444-4e9d-b40e-36076fc267b0"
  }
}
Creating a binary recap
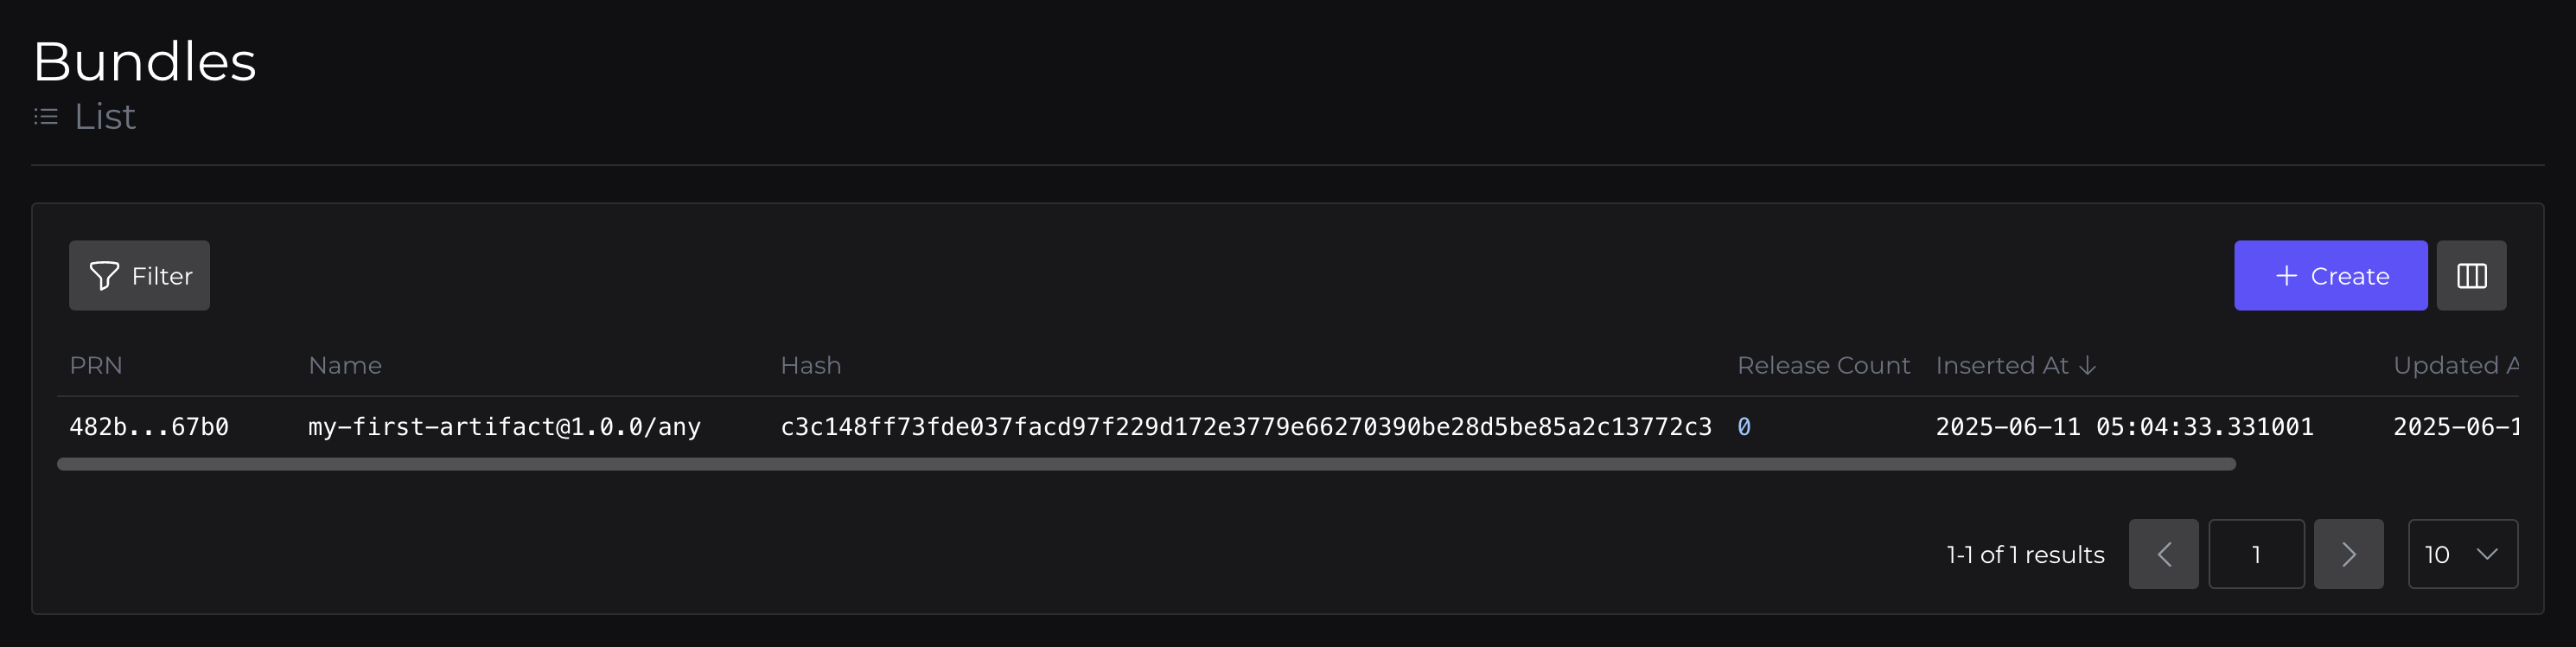
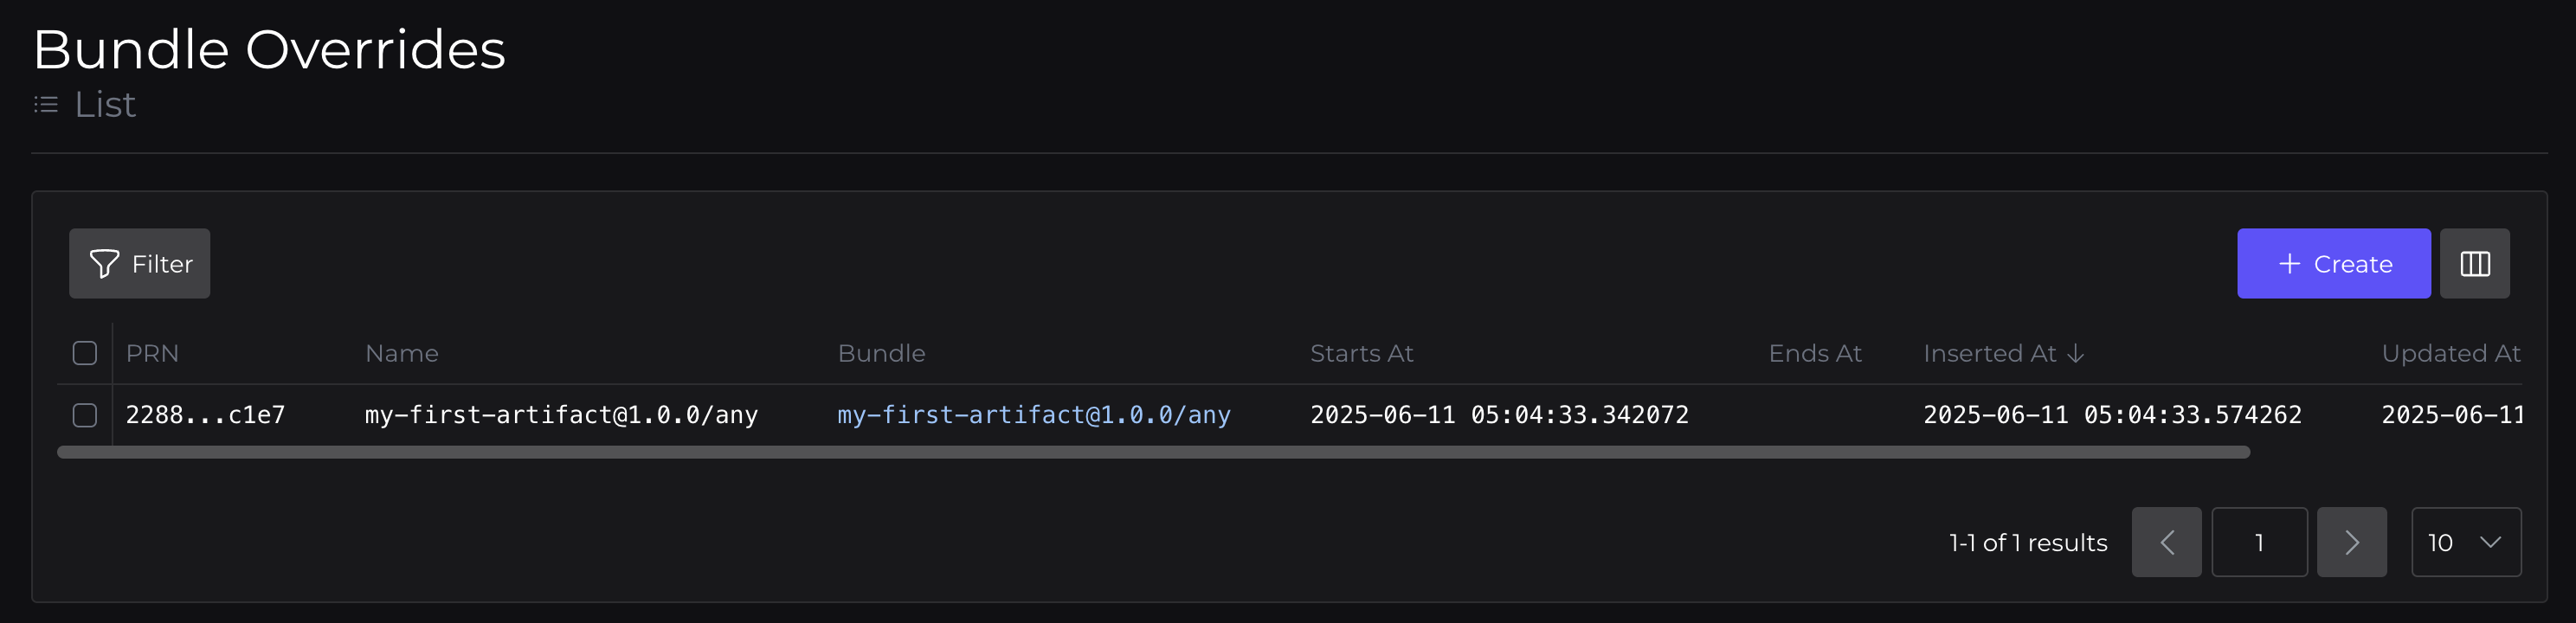
So, click over to console.peridio.com and review what we've done by going to Artifacts.
Here you'll be able to see the Artifact, which has a Version, with an associated Binary. This Binary is included in a Bundle, which is served by a Bundle Override.
Artifact: my-first-artifact
Artifact Version: 1.0.0
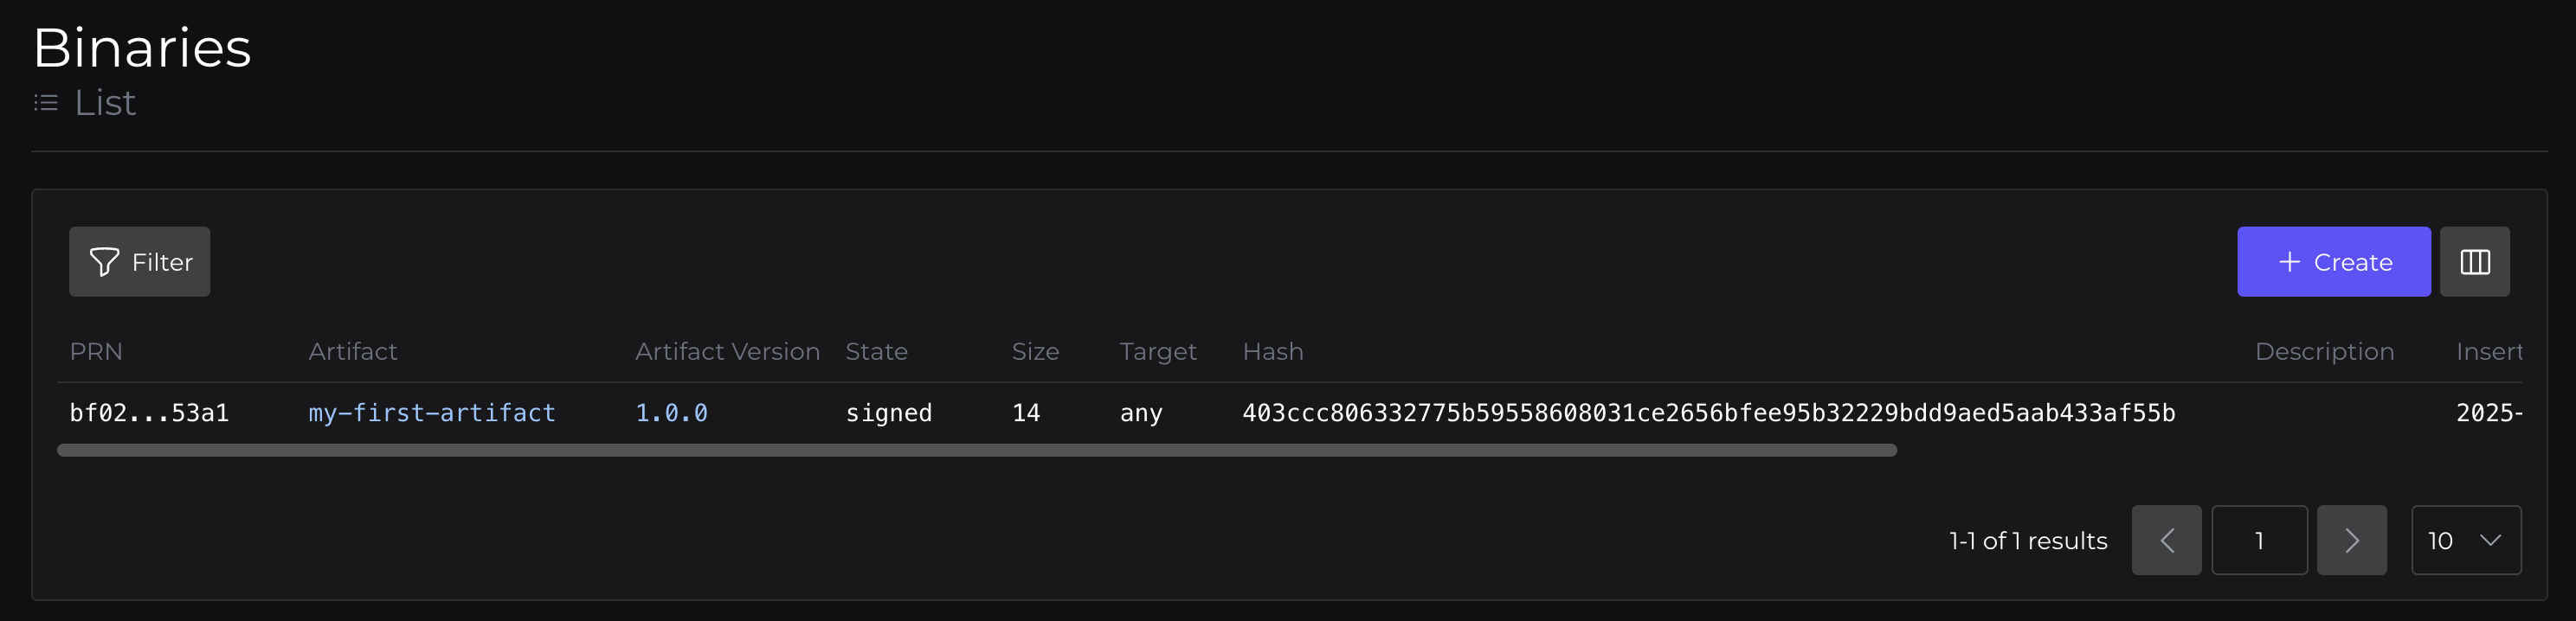
Binary: with a target of any, and status signed
Bundle: which contains our one binary
Bundle Override: which delivers our bundle to our device
Updating our device
Last last piece, we now go to the device detail screen to see if its eligible for an update.
Go to Devices > Device > Overview and scroll down. You'll see a section at the bottom, Active Bundle.
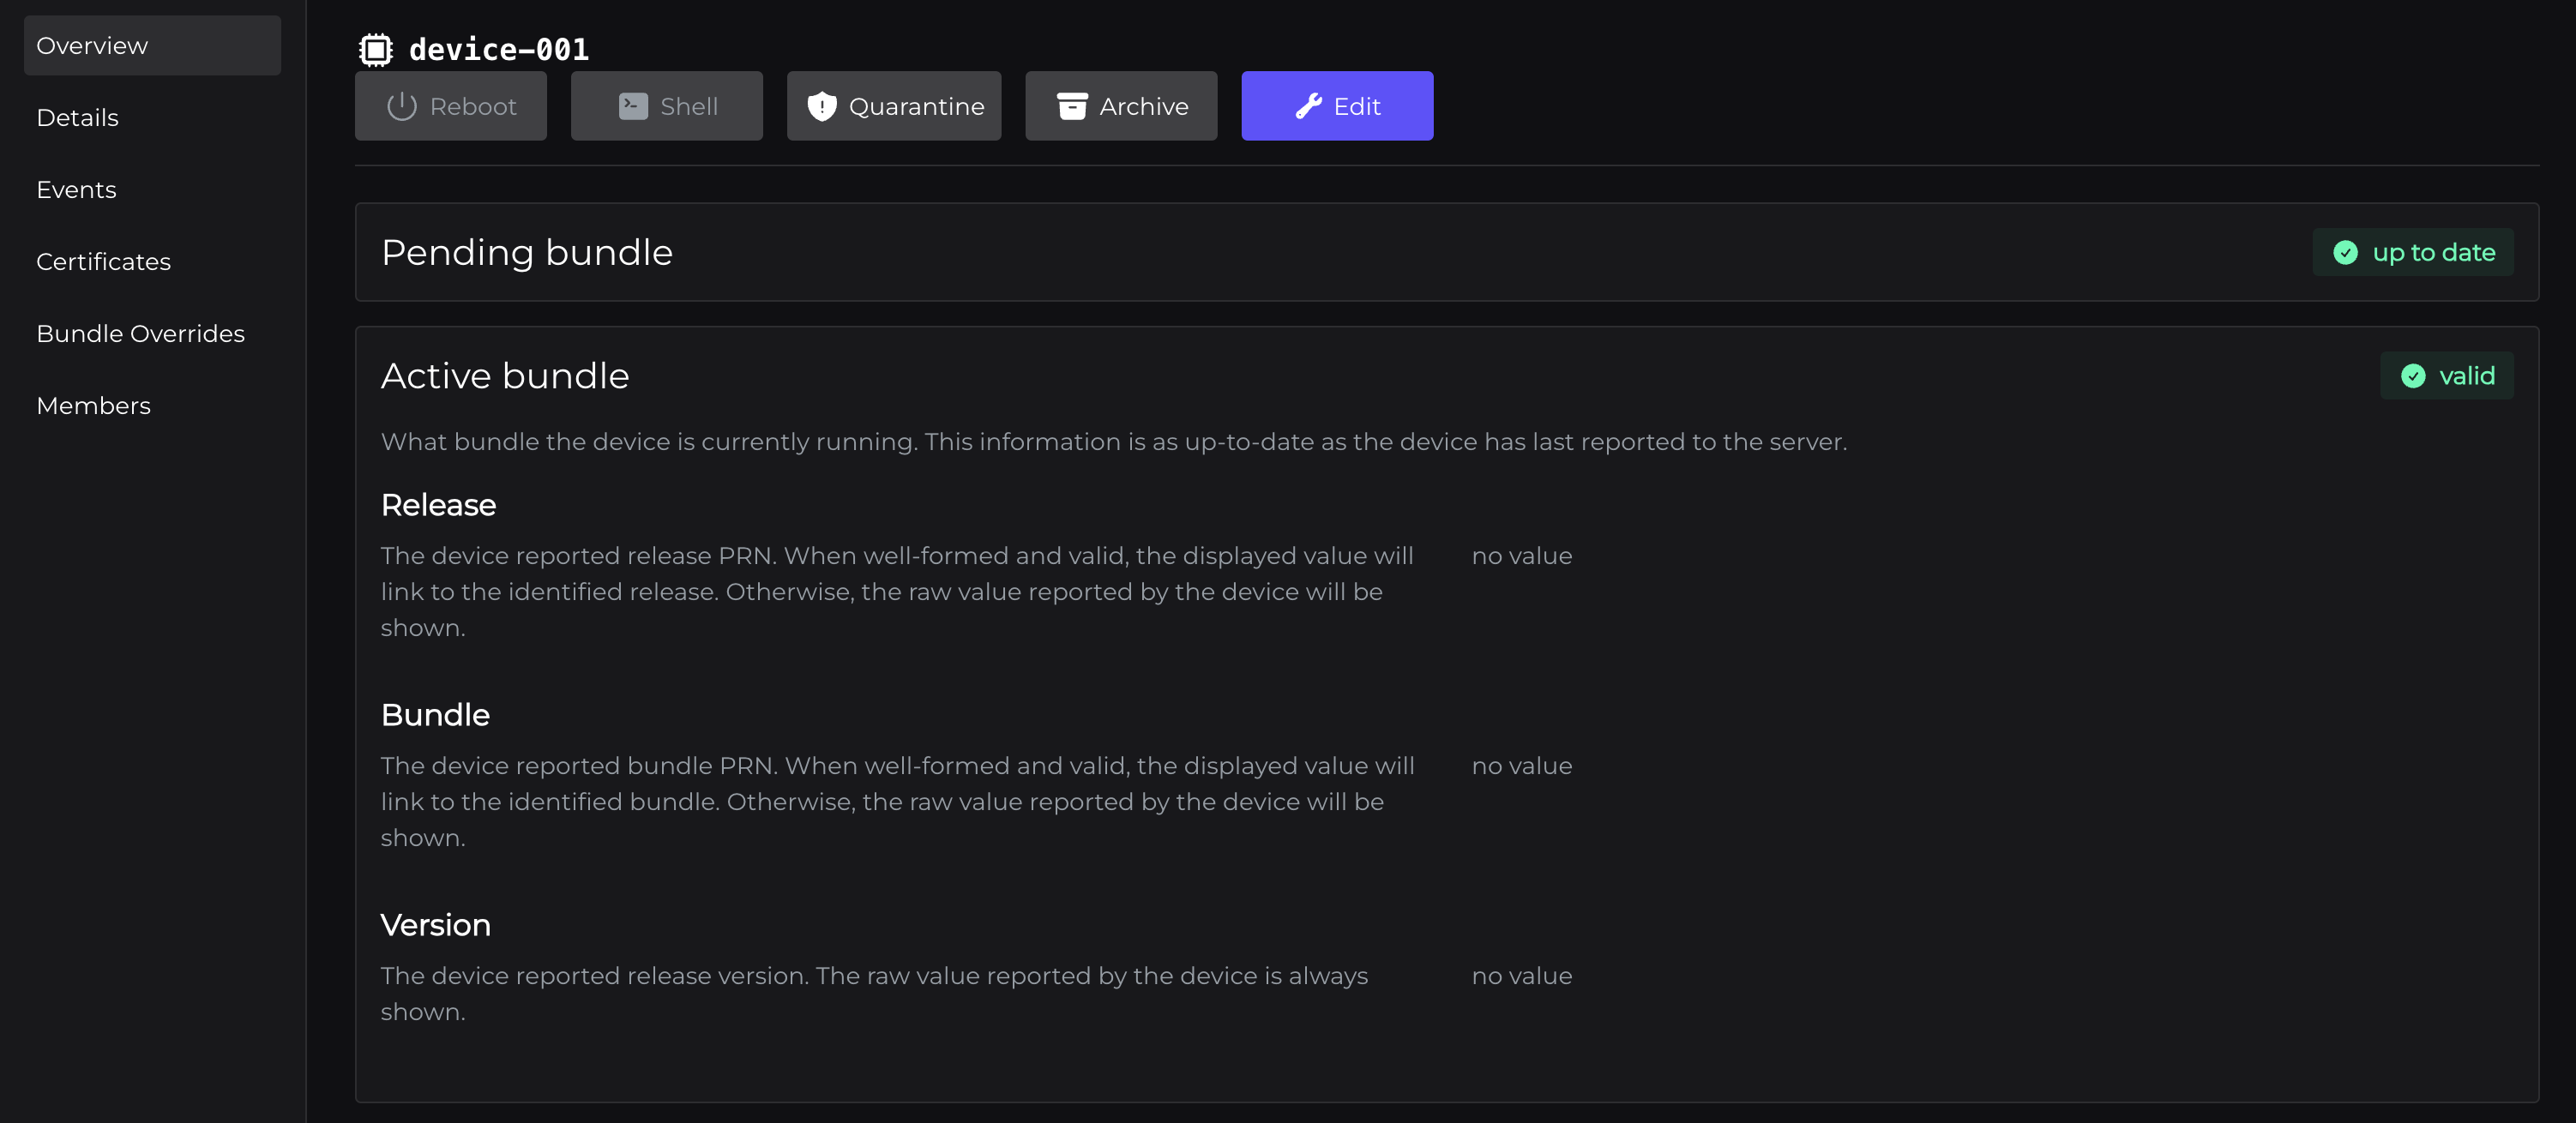
And note that this device's "Active bundle" shows no values for the Release, Bundle or Version properties. This is expected, as our device has never "checked in" with Peridio.
The device must make known what version or bundle it's currently running, as the Peridio platform does NOT make those assumptions on behalf of the device.
Checking to see if a device has an update
Lets get back to the CLI and see how updates actually work. We can check to see if a device has an update available using the devices get-update command:
peridio --profile peridio-demo devices get-update \
  --prn prn:1:8ced1740-7fbf-407e-9d6e-afec9399cc41:device:429698bf-6ac2-40de-bac9-9969d9305945
Response:
error: the following required arguments were not provided:
  --release-prn <RELEASE_PRN>
  --bundle-prn <BUNDLE_PRN>
  --release-version <RELEASE_VERSION>
And we get back an error. This is because a device MUST make known its current state in order to receive and update. Lets assume this device is at 0.0.0 as that was the version requirement for our release.
peridio --profile peridio-demo devices get-update \
  --prn prn:1:8ced1740-7fbf-407e-9d6e-afec9399cc41:device:429698bf-6ac2-40de-bac9-9969d9305945 \
  --release-version 0.0.0
Response:
{
  "status": "update",
  "bundle_prn": "prn:1:8ced1740-7fbf-407e-9d6e-afec9399cc41:bundle:482b9931-1444-4e9d-b40e-36076fc267b0",
  "source_prn": "prn:1:8ced1740-7fbf-407e-9d6e-afec9399cc41:bundle_override:2288ecac-38b9-4f7f-b098-ed3cddf4c1e7",
  "source_type": "bundle_override",
  "manifest": [
    {
      "artifact_prn": "prn:1:8ced1740-7fbf-407e-9d6e-afec9399cc41:artifact:8afd6899-fdee-4f39-b2f8-cdcb4c945e21",
      "artifact_version_prn": "prn:1:8ced1740-7fbf-407e-9d6e-afec9399cc41:artifact_version:6ab0d328-a6fe-49b8-8659-cd927b6f3c8d",
      "custom_metadata": null,
      "prn": "prn:1:8ced1740-7fbf-407e-9d6e-afec9399cc41:binary:bf02c28a-56b3-411f-ba88-f92d947c53a1",
      "hash": "403ccc806332775b59558608031ce2656bfee95b32229bdd9aed5aab433af55b",
      "signatures": [
        {
          "signing_key_prn": "prn:1:8ced1740-7fbf-407e-9d6e-afec9399cc41:signing_key:18d20763-bc23-40b0-abe5-702ea134be53",
          "signature": "EA9C0A0078B1DE6F814BCDADB0E5D91D9E6E58C5882DFE689F0518DB135E0966DF9F52D6162A13201CB733EDBFD2F0B384D67BDD8B058D9E9AA24DF632365905"
        }
      ],
      "size": 14,
      "target": "any",
      "url": "https://s3.us-east-2.amazonaws.com/peridio-cremini-default-web/binaries/3a0438c7-79e3-469b-9bc7-16380d1ef369/58d38d95-faaa-4203-8c08-71f2d8ee595b?X-Amz-Algorithm=AWS4-HMAC-SHA256&X-Amz-Credential=ASIAX2ZJDQVUSZ5MP2R2%2F20250226%2Fus-east-2%2Fs3%2Faws4_request&X-Amz-Date=20250226T041329Z&X-Amz-Expires=86400&X-Amz-Security-Token=IQoJb3JpZ2luX2VjEBoaCXVzLWVhc3QtMiJGMEQCIDBU6TxBsNPpdkPSZ62UI3K5DojAxkQoSqEOSZXM7W7eAiAdGy6J2ys%2F8dq8Cy0dnJnx7kjGyYxQjiYjEaDg8rLN8Sr1AwhTEAMaDDUzODU2NzczODcyOSIMEFTG9D6KISBLV6OqKtID%2F9G3zLpXH807FzgTutqujkYXp3GHOw1x2eqR3eqhVbzui0Tx11E%2B74XLYMew1Gt%2BoGEgAKud4VwNDg3snz2g93g7o%2FTJNCwaYtLVaHeT3Do%2Bm%2Ff700O6FsePZLlS5QmKTpHfpDds%2BxtRE%2FOojMjPIB5UHkiQq3H%2BE5nwnNOjntatsxVim63UkZ5mGRvnuwlc%2Fj0fSnaxv7YAcw78IAJ0pdNqdh0s82vTq%2FbdDNIrY4IdDIdXya%2FhmSEhTuw6PjOgcsibQrWFY9TQCKejGlZm%2B31yWK%2BGw9%2Byb%2BOAUkKCU55rvsuSkqukPxpaD3O9IxA7SqBvw1HhCioOrPXpBJJhqfoRgLfoQ8VoiZdOSxI%2FUmNNmmFiDXPElqjlpQgDT%2B8SHI%2FHO1UXf3avbMKZU6vkOuJzcgMT2NVlH9YR8DeEgdwwKrnn1tJ4F6M1PY%2FOd6cVkaVBRYPZypwPAuFmd19vAJnRQxD5ylt45RGgteLfdNd6thfaGNLuFEaLoXGMjJwkIUvqjeilZf6kBExZdX%2FocZBJ7aZSai36tdpOum5VjGooifNzakUsrHdLd7R4J9Jb914lD8FfvtGTD0%2FCZX0dvLEpoMuX9tDrx0GyjLDAc0cEeTDK6Pm9BjqmAQv9RvnZUmgCpLe680LtSp8fhmVbFOueSuiyES026131E7uOy56nE2jP02%2Bc7AJCkHf%2F%2Bhi5tQig0eEouGRJZHFx%2BPi2O3A%2FlS7%2Fe5J0kta874ysaI%2FWZat9opKPTPsDJwHanZIZJAI86AIq5md%2FZ%2Boay9E2G9ZKW9yiO7Do8UCN8qtyHUMf7765RwjzKN%2BAOref2yUQ4RPI7pUbZRBf7aLvE%2F0QYLg%3D&X-Amz-SignedHeaders=host&X-Amz-Signature=8c1d26e67e7e544eb04f0e1ae2157841129b02c67baa5a05d7952299f0b46fcb"
    }
  ]
}
Evaluating that payload, it contains everything we need in order to apply that update in the field, specifically the value in manifest:url contains the pre-signed url of the file we wish to install.
In this case, we are delivering a bundle to our device via a bundle override, as specified in the response's source_type.
Simulating a device update
Now, lets simulate the actual update — if we want Peridio to "think" that this device took the update, we repeat the request, but this time pass in the bundle-prn from that update (rather than the version), and pass in the --write flag.
peridio --profile peridio-demo devices get-update \
  --prn prn:1:8ced1740-7fbf-407e-9d6e-afec9399cc41:device:429698bf-6ac2-40de-bac9-9969d9305945 \
  --bundle-prn prn:1:8ced1740-7fbf-407e-9d6e-afec9399cc41:bundle:482b9931-1444-4e9d-b40e-36076fc267b0 \
  --write
Response:
{
  "status": "no_update",
  "bundle_prn": null,
  "source_prn": null,
  "source_type": null,
  "manifest": null
}
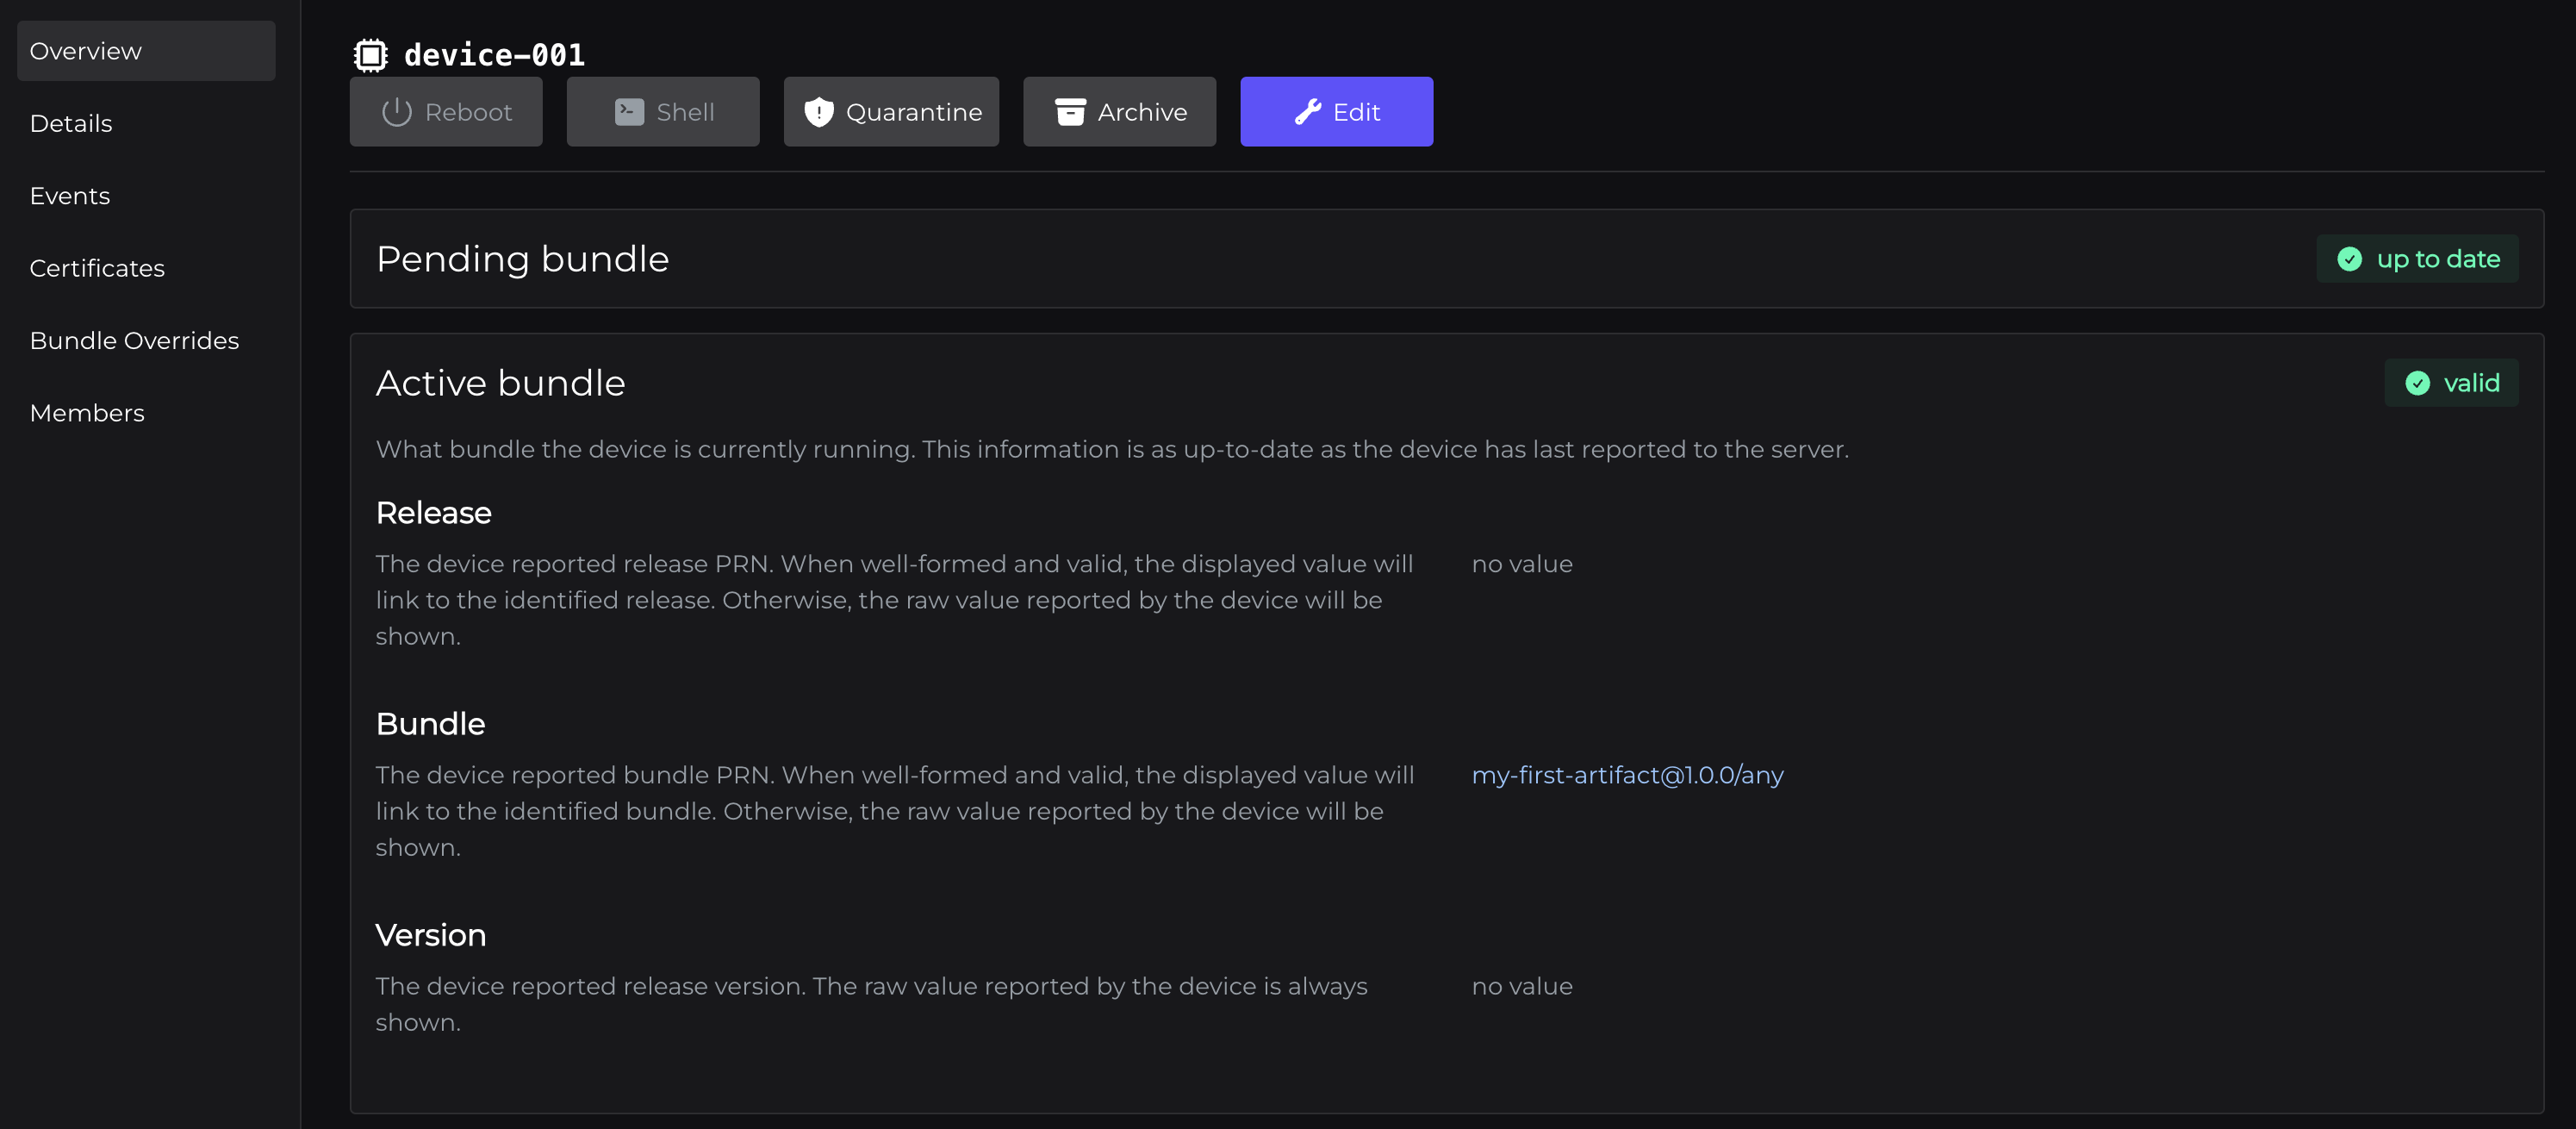
Verifying that an update was registered in the console
And note, now when we go back to the console, we're reporting that the device has progressed to our bundle!
Wrapping up
This guide has walked you through the basics of using Peridio for embedded device firmware updates, but it's by no means an authoritative or exhaustive resource. We've covered the fundamental concepts and workflows to help you get started:
- Setting up your account and organization
- Creating your first product, cohort, and device
- Configuring your development environment
- Managing signing keys for secure updates
- Uploading binaries
- Making binaries available to our device
- Simulating device updates
We hope this introduction has provided you with a solid understanding of Peridio's core capabilities and workflow. From here, you can explore more advanced features through our comprehensive documentation, experiment with real device deployments, implement CI/CD pipelines, and leverage Peridio's APIs for deeper integration with your development processes.
If you have questions or need assistance, don't hesitate to reach out to our support team. We're excited to see what you'll build and deploy with Peridio!