Remote Tunnel
This guide shows how to open a remote access tunnel to a deployed Avocado OS device from the Avocado Connect console and use it for SSH, a web dashboard, or any other TCP service on the device.
Remote tunnels are a feature of Avocado Connect, the fleet management and device operations platform for Avocado OS. The device dials out and Connect's relay brokers the connection, so you can reach hardware behind NAT, firewalls, or cellular links with no static IPs, port forwarding, or VPN setup. This is all enabled by WireGuard. Every session is audit-logged — who connected, when, and for how long.
Prerequisites
- An Avocado Connect account — sign up for a free developer account at connect.peridio.com/login
- A device provisioned with Avocado OS, enrolled in Connect, and showing Online — see the First OTA mission for the full setup flow
- The device's runtime includes the
avocado-ext-connectandavocado-ext-tunnelsextensions (tunnels are gated on device capability) - To use a tunnel for SSH, the runtime must also run an SSH server (e.g.
avocado-ext-sshd-devin development); likewise, Cockpit on port9090requires theavocado-ext-cockpitextension
NOTE: If you do not want Remote Access Tunnels enabled, simply remove the avocado-ext-tunnels extension from your avocado.yaml file.
Choose a port
A tunnel forwards one device port to your machine. Common choices:
| Service | Port | What you get |
|---|---|---|
| SSH | 22 | A remote shell on the device |
| HTTP | 80 | A web service on the device |
| HTTPS | 443 | A TLS web service on the device |
| Cockpit | 9090 | The device's web-based management UI |
| Custom | any | Anything else listening on the device — e.g. a web frontend on 3000 or 5000 |
Custom ports are useful if your application hosts a web frontend (say on port 3000 or 5000), a tunnel gives you an exact view of what a user standing in front of the device sees — or lets you reach an internal dashboard.
Open a tunnel
- Open your device in Connect. The Tunnels panel lives on the device detail page, and the Agent section confirms the device reports Tunnel Capable: Yes.
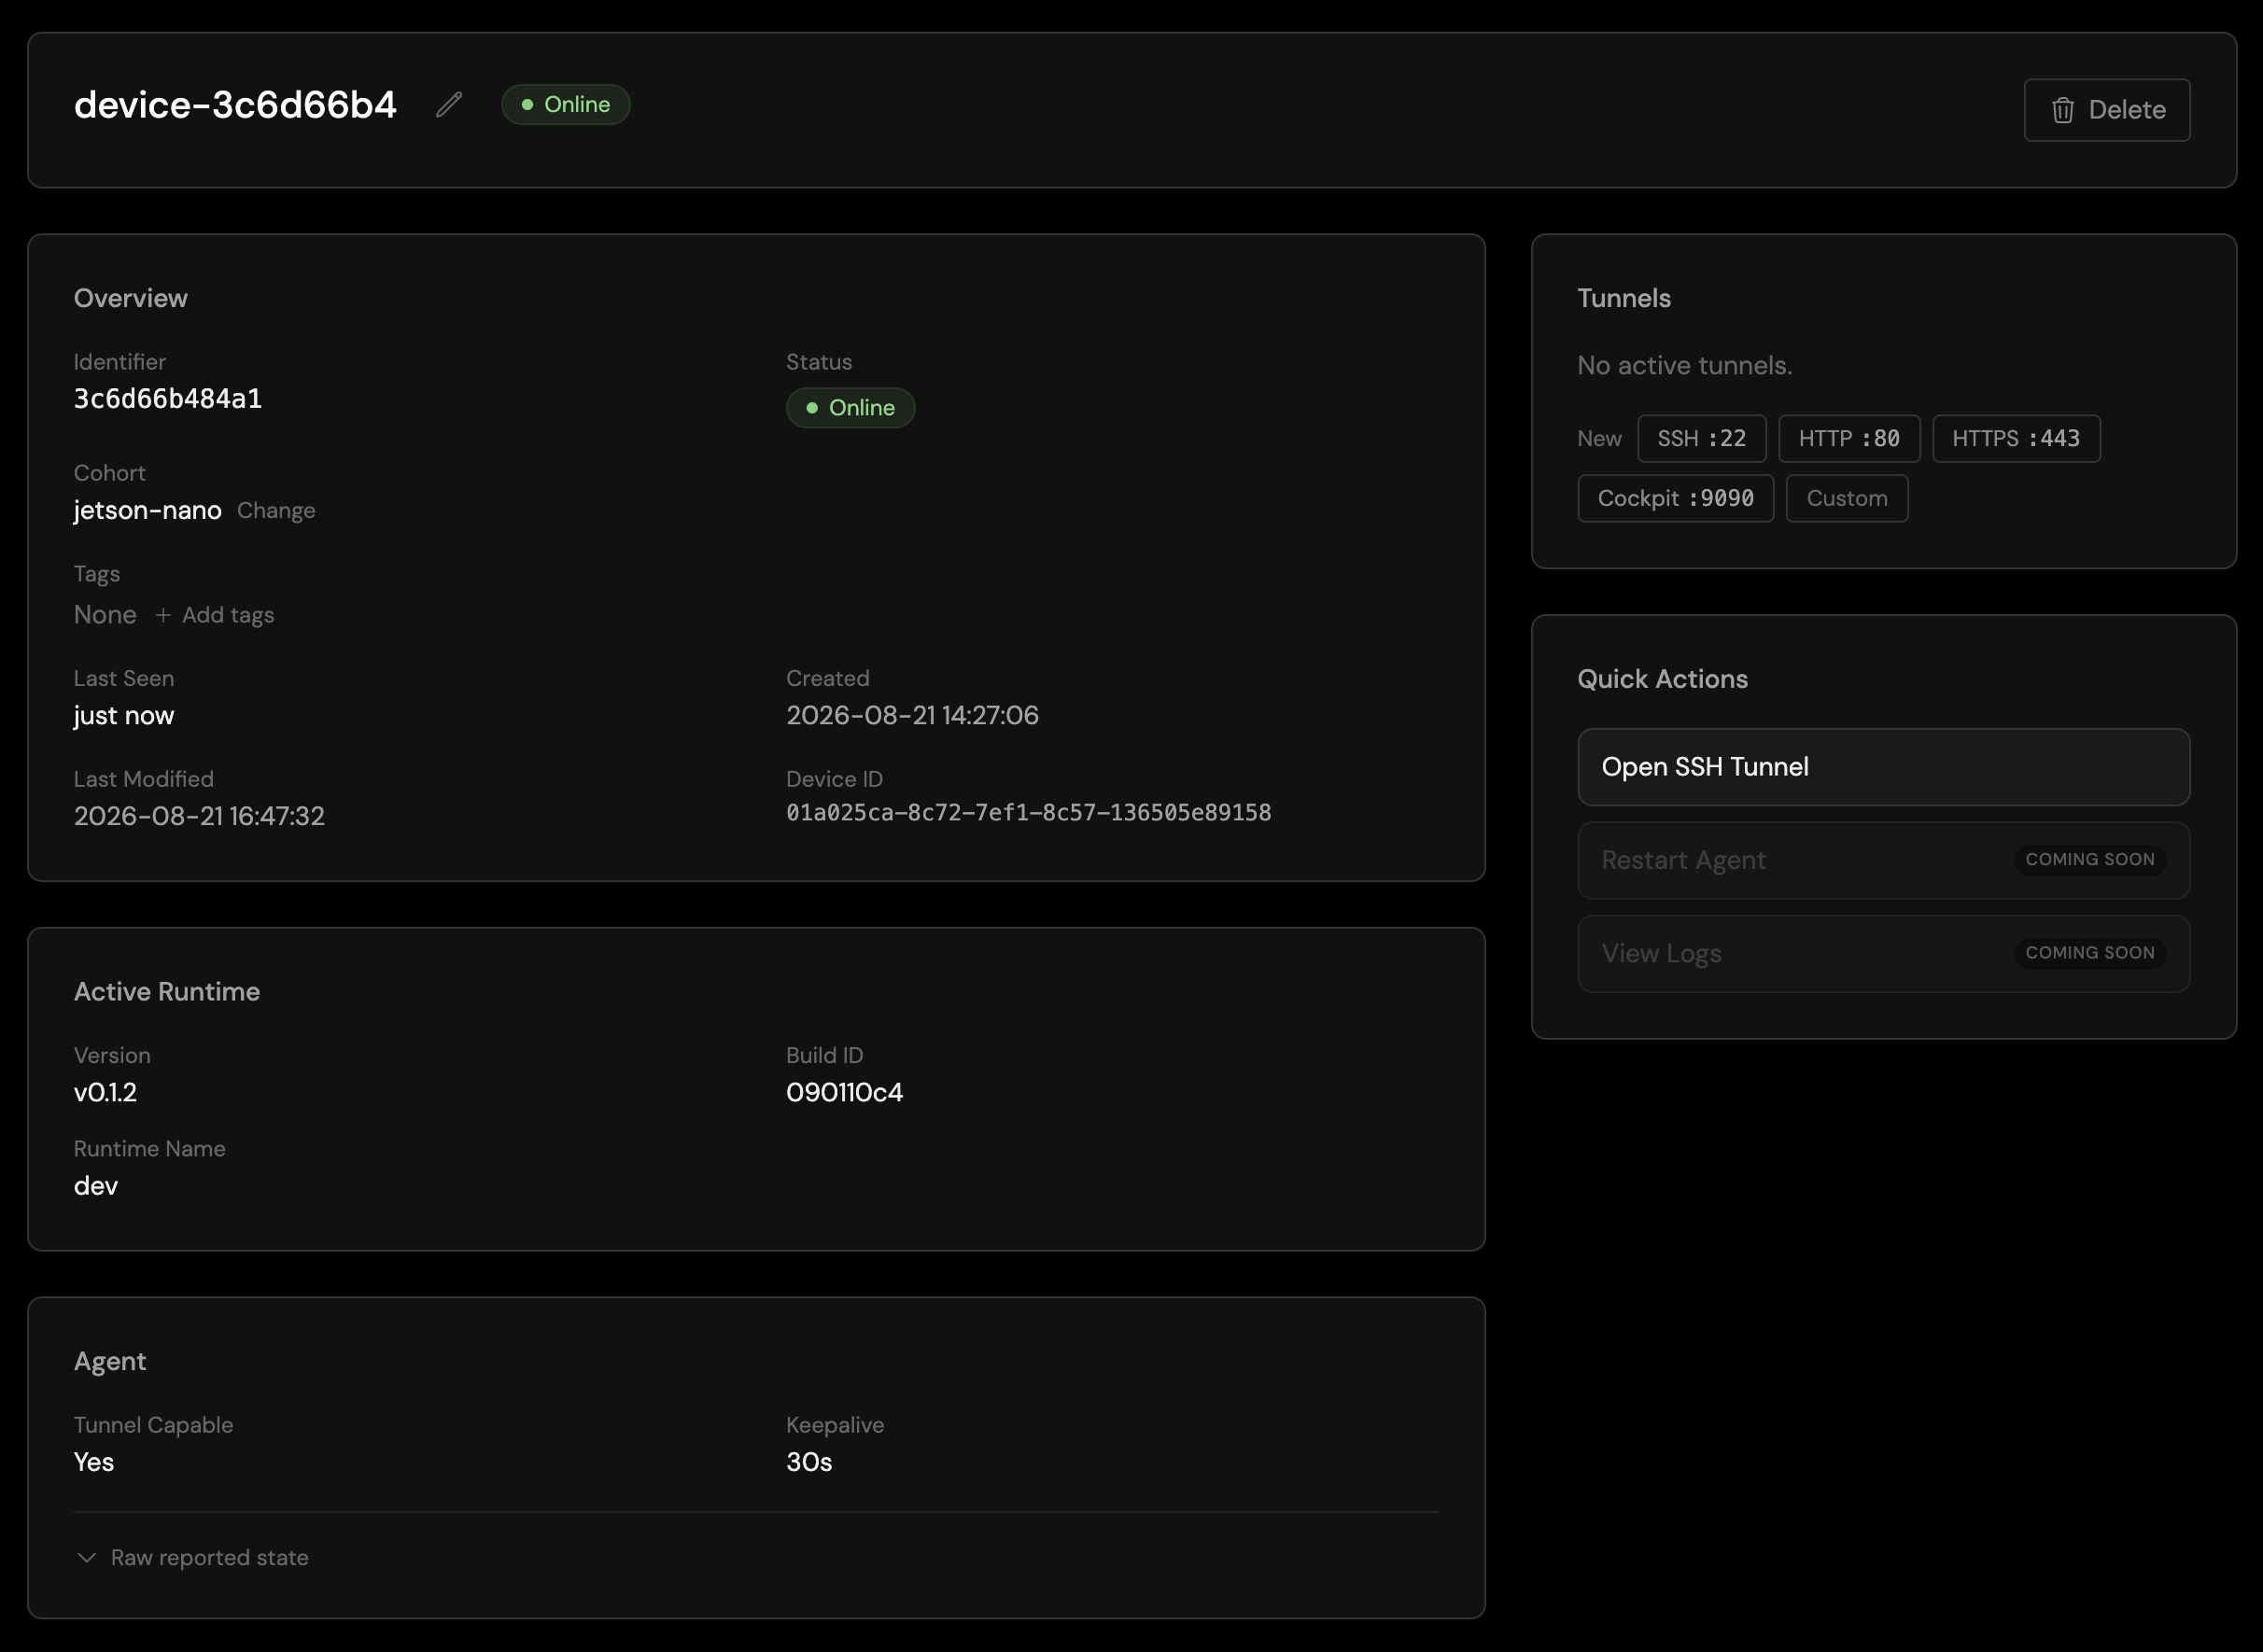
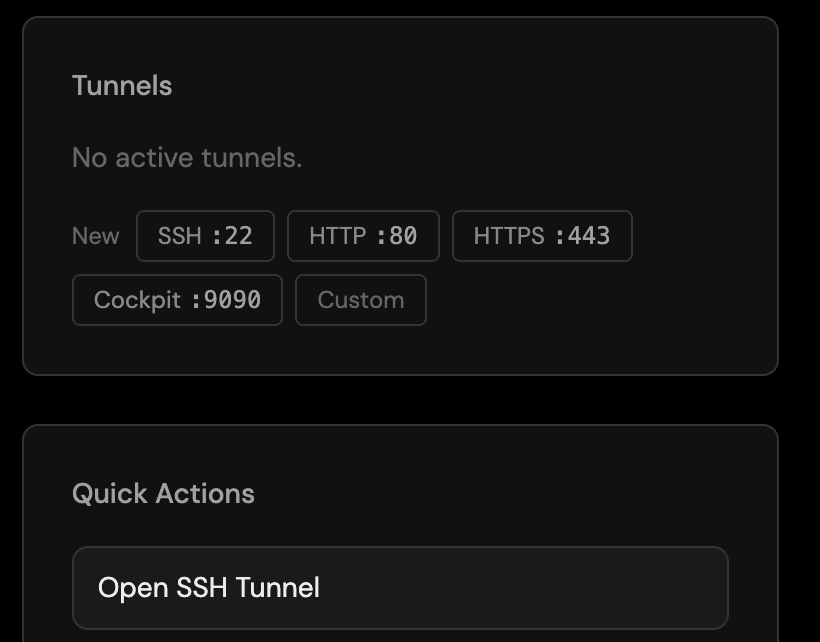
- Under New, pick a standard port — SSH :22, HTTP :80, HTTPS :443, Cockpit :9090 — or choose Custom and enter any port. For SSH there's also the Open SSH Tunnel quick action.
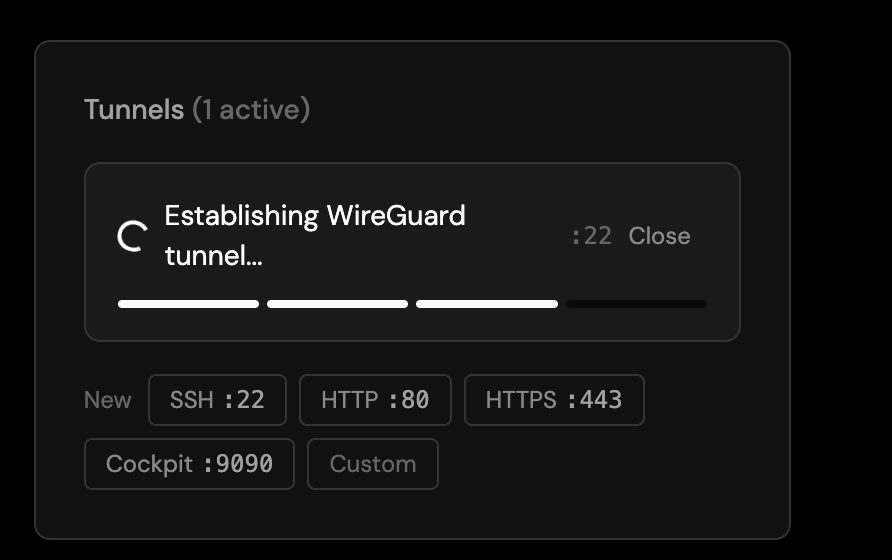
- Connect establishes the WireGuard tunnel to the device.
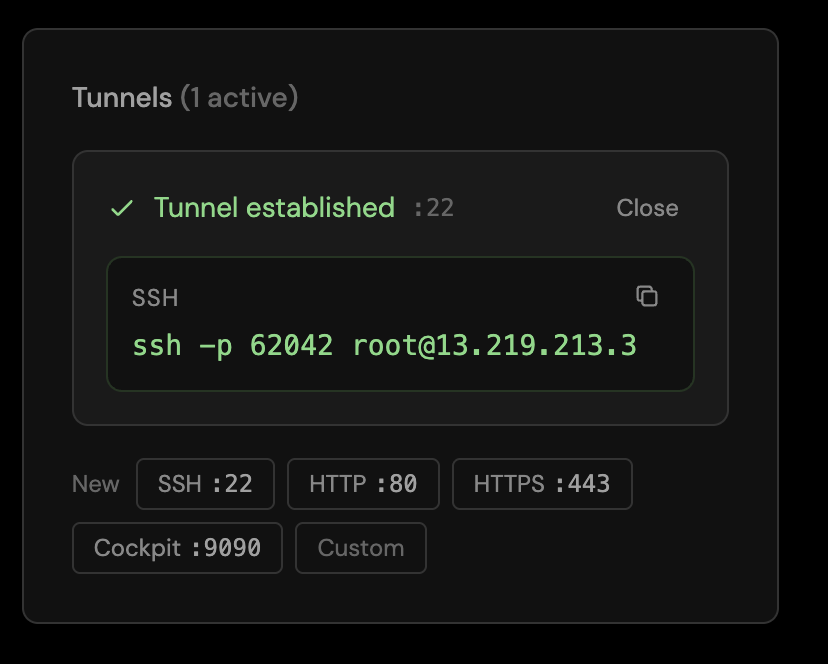
- Once the tunnel is established, Connect shows the connection details — for SSH, copy the ready-made SSH command.
Use the tunnel
- SSH (port 22): run the copied SSH command to get a shell on the device.
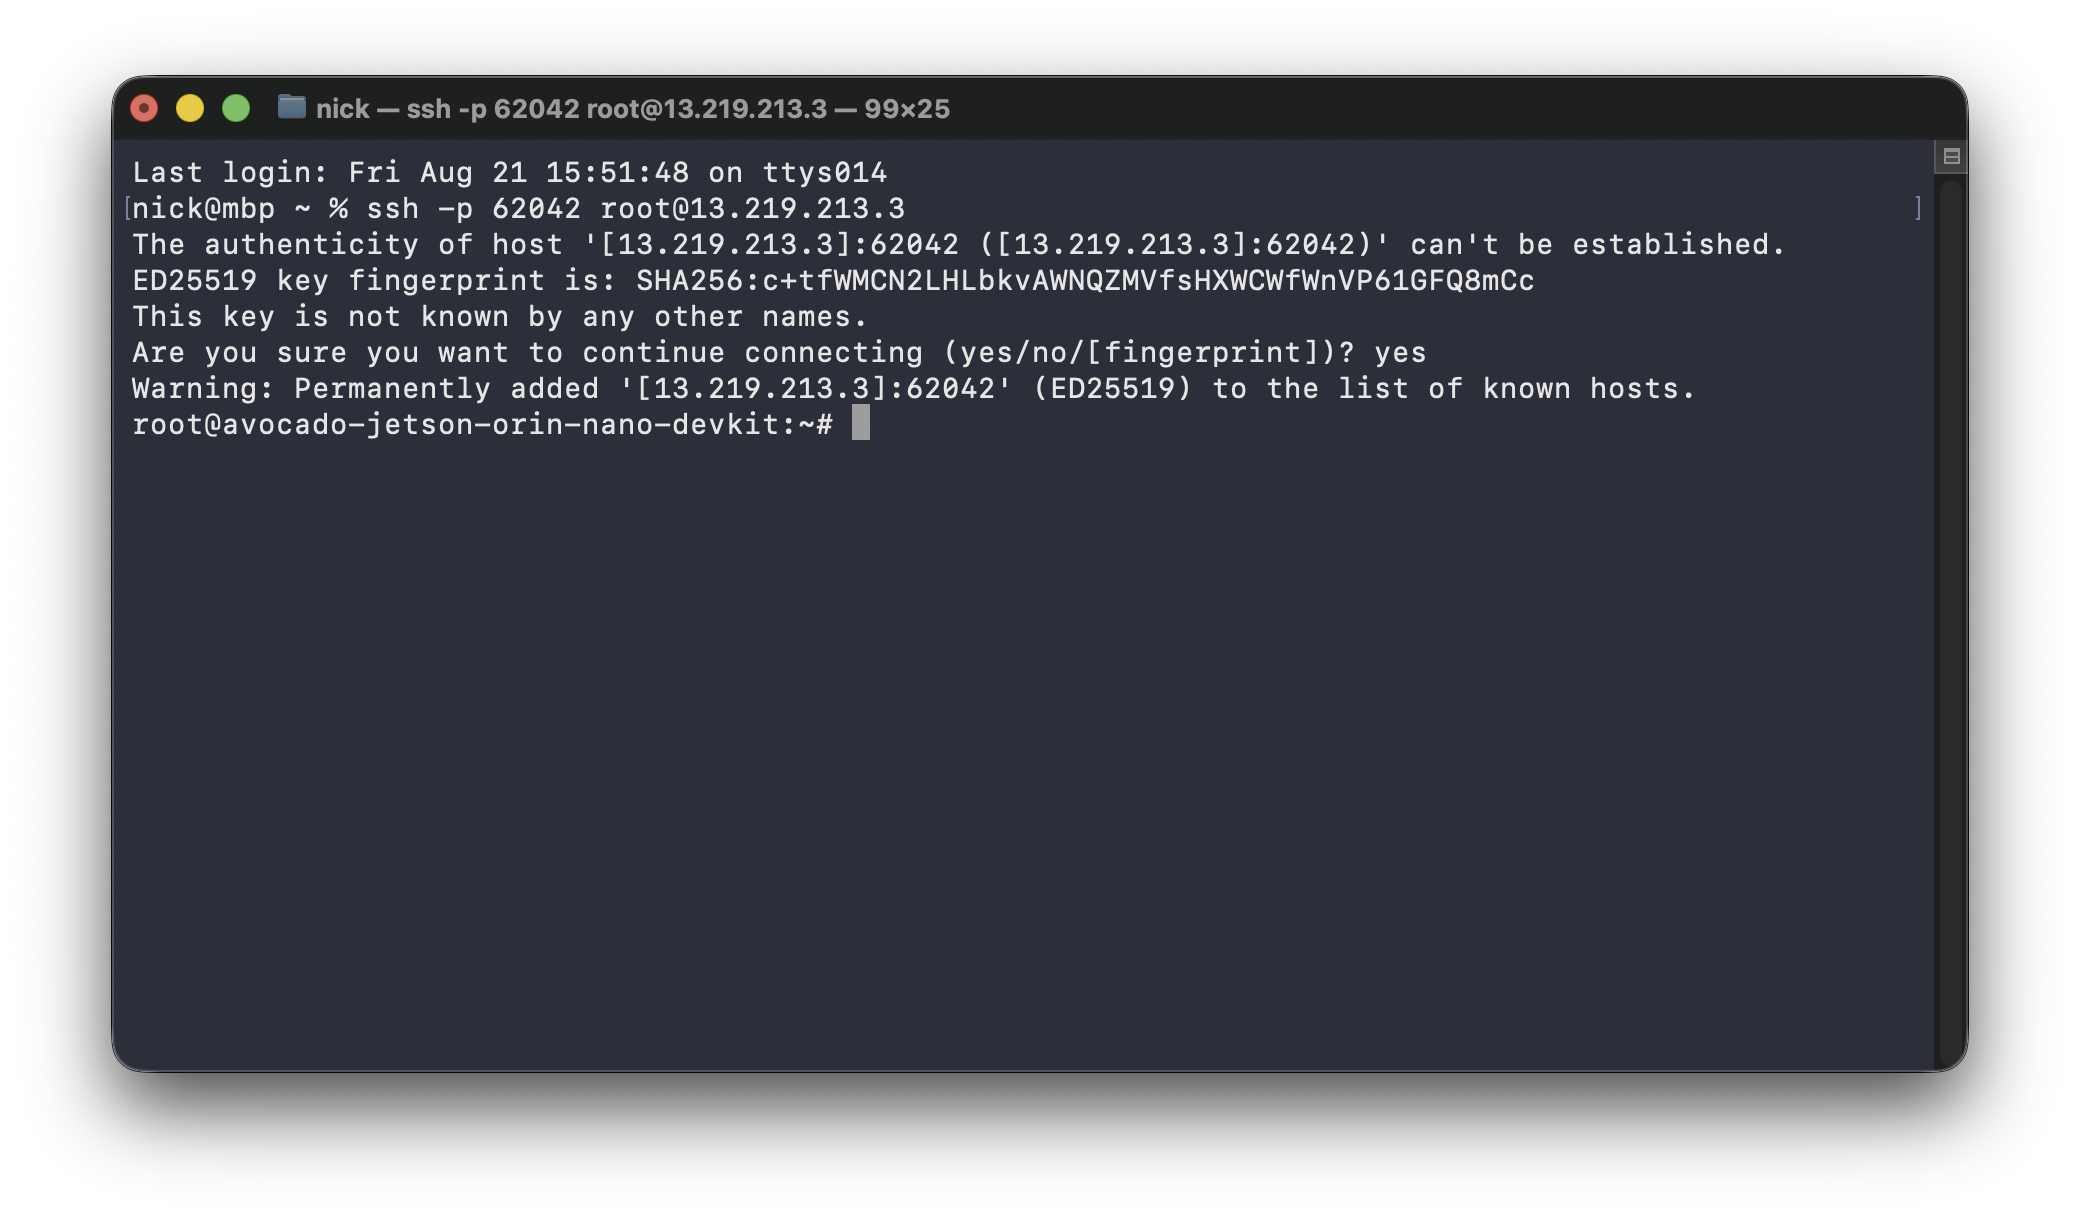
Example: view a device dashboard on a custom port
First, close the SSH tunnel from the previous section (Close next to the tunnel) — the developer plan tunnel policy allows one active tunnel at a time.
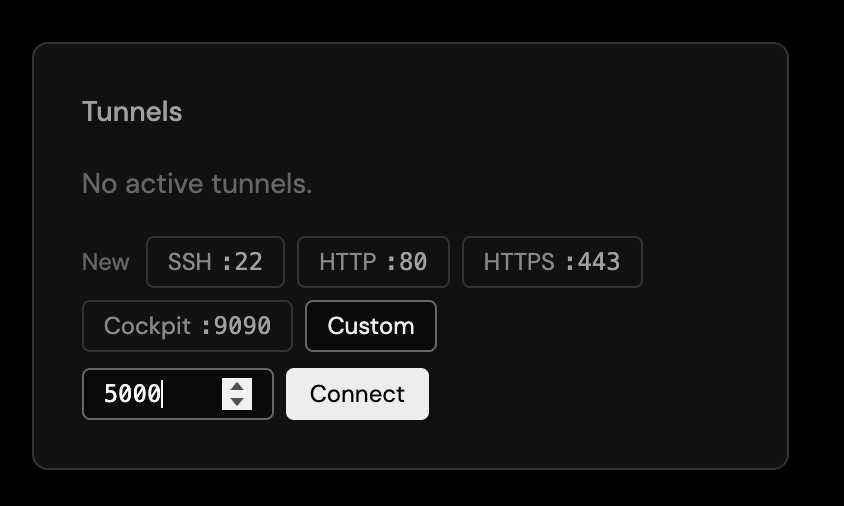
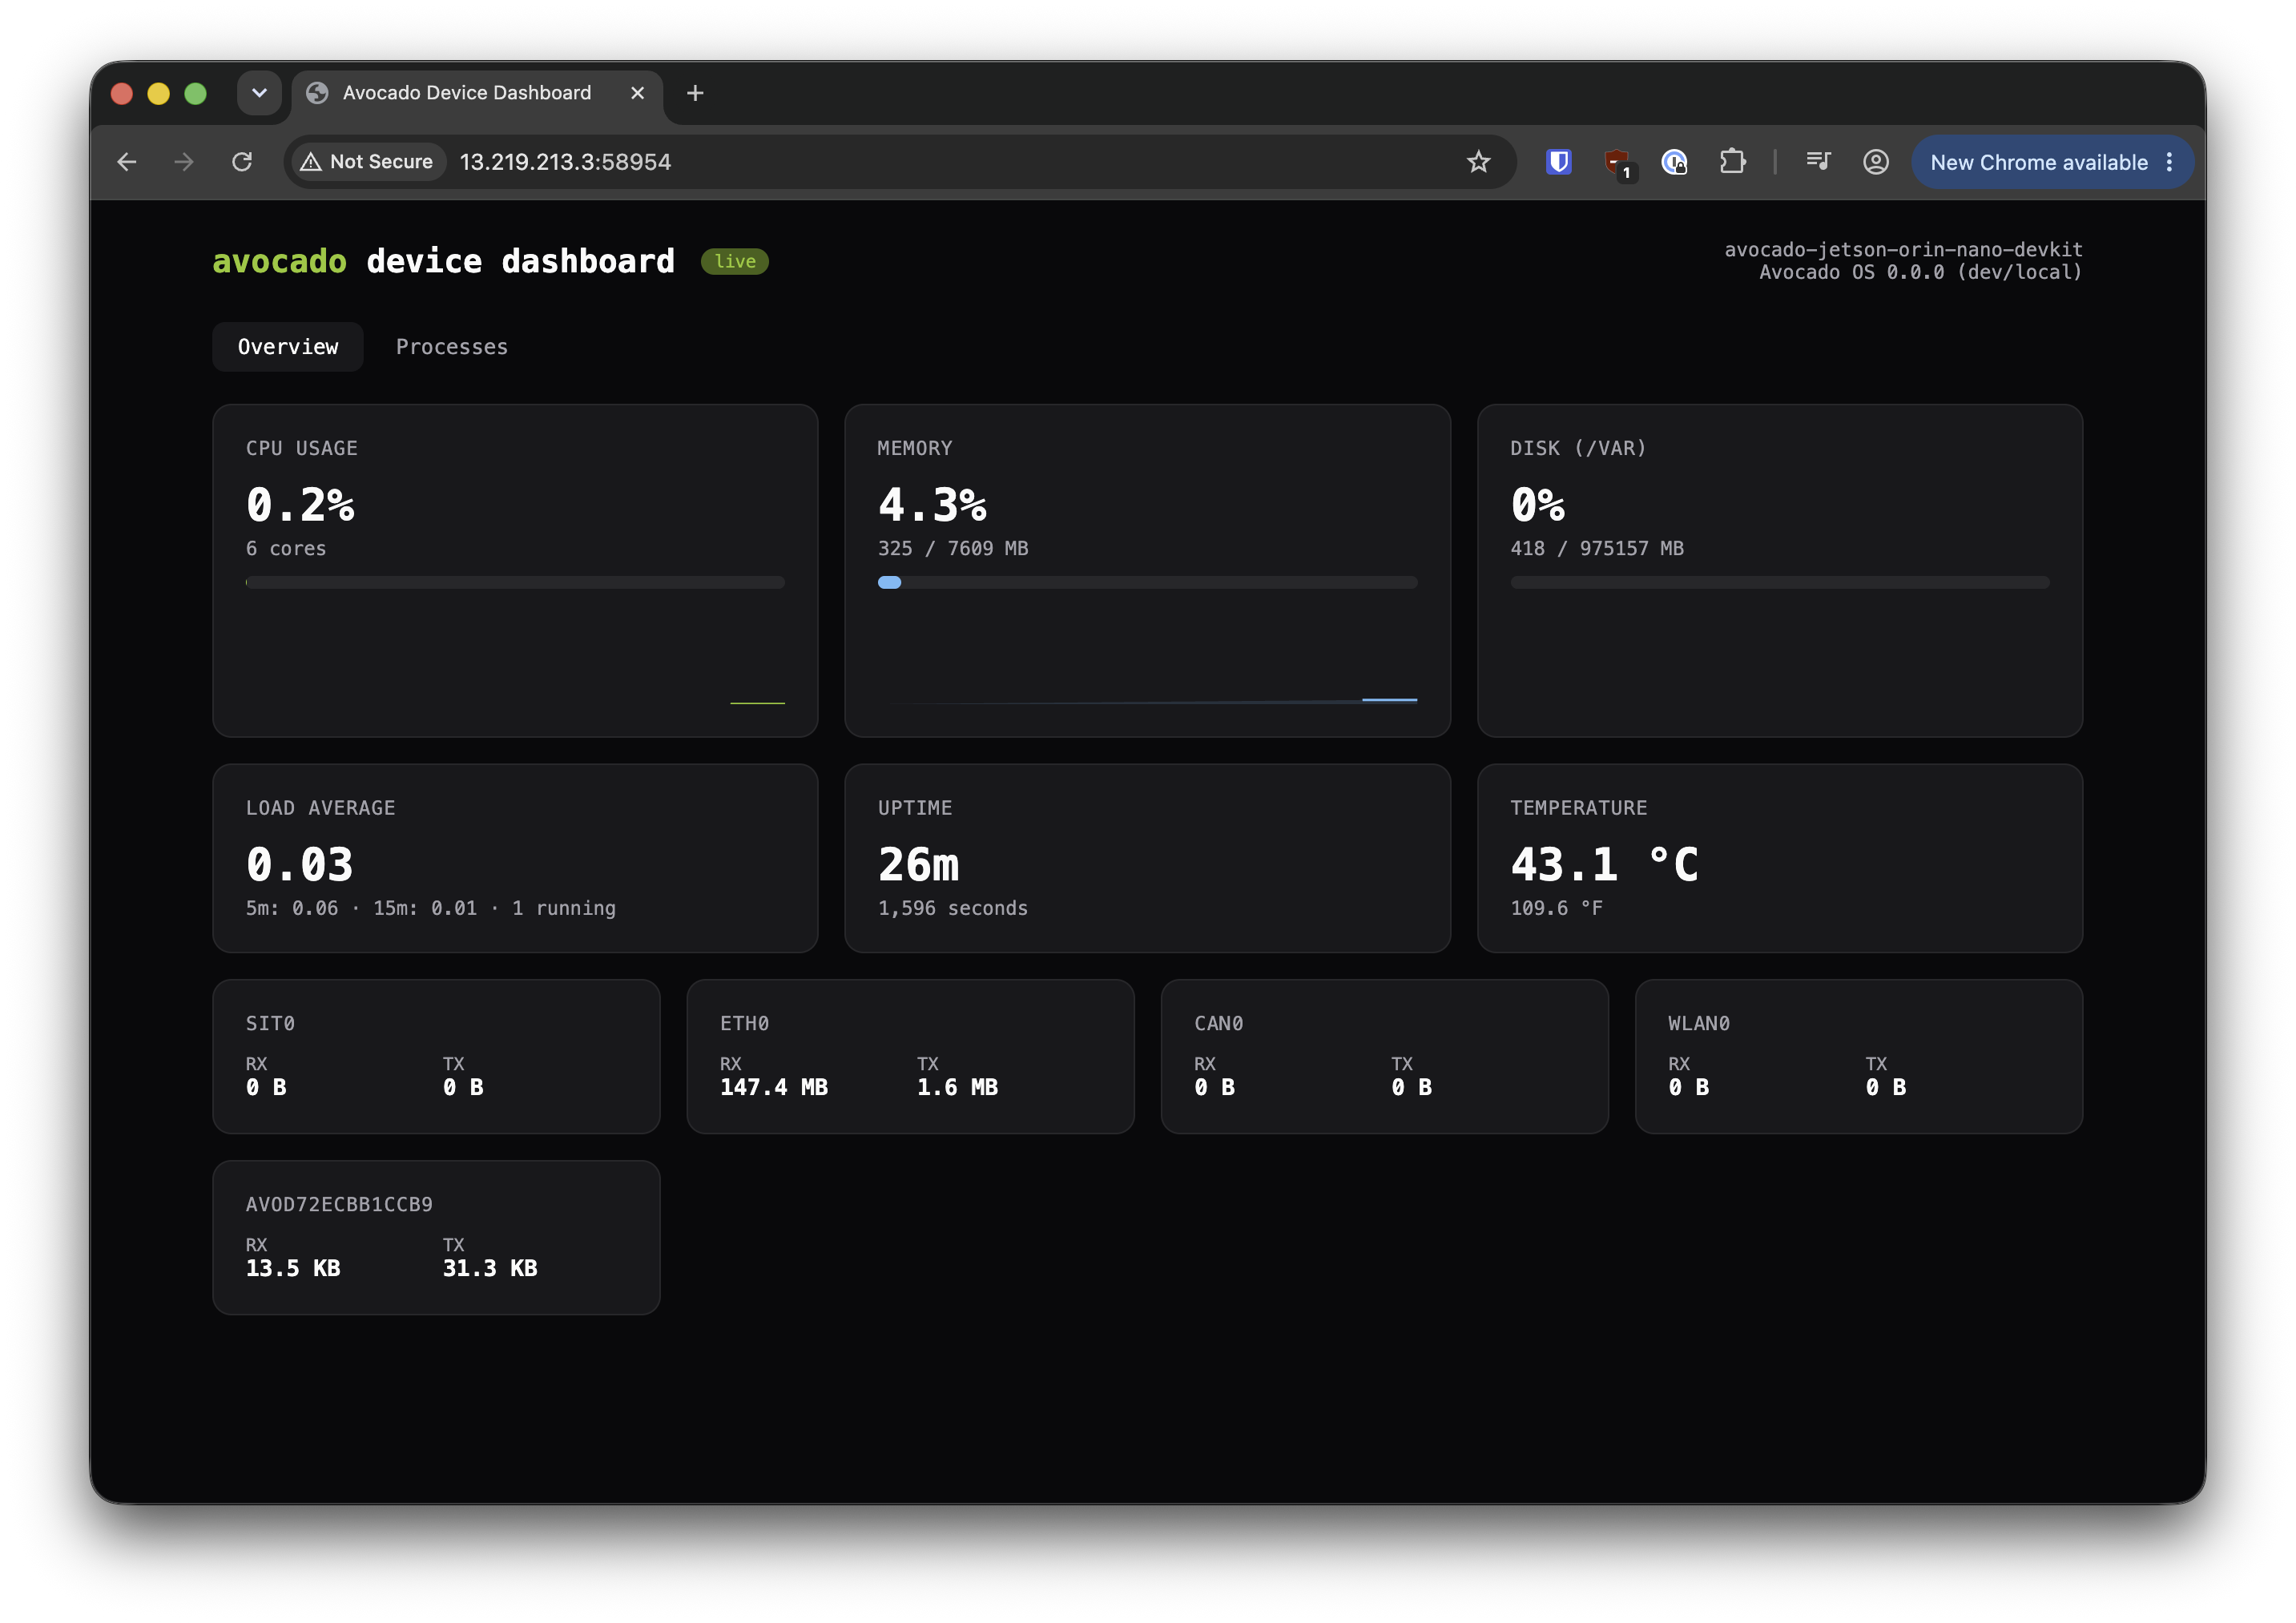
Say your application serves a dashboard on port 5000 — this example uses the python-flask reference, which hosts a live device dashboard. Choose Custom, enter the port, and click Connect.
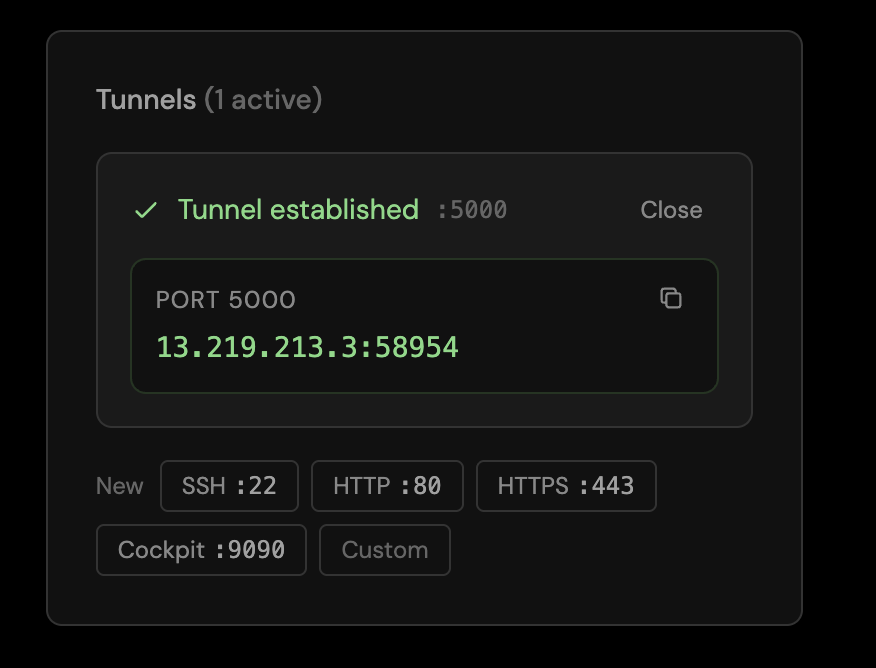
Once established, the tunnel shows an endpoint (host and port) instead of an SSH command — copy it.
Open the endpoint in your browser: the device's dashboard renders live through the tunnel, exactly as it would for someone on the device's own network.
Tunnel lifetime
- Tunnels expire automatically after their TTL, so access is temporary by default. Close a tunnel early from the device's Tunnels view in Connect.
- Every tunnel session is recorded for audit: who opened it, to which device and port, and for how long.
- For a higher-level look at remote access in Connect, see the Remote Access overview.