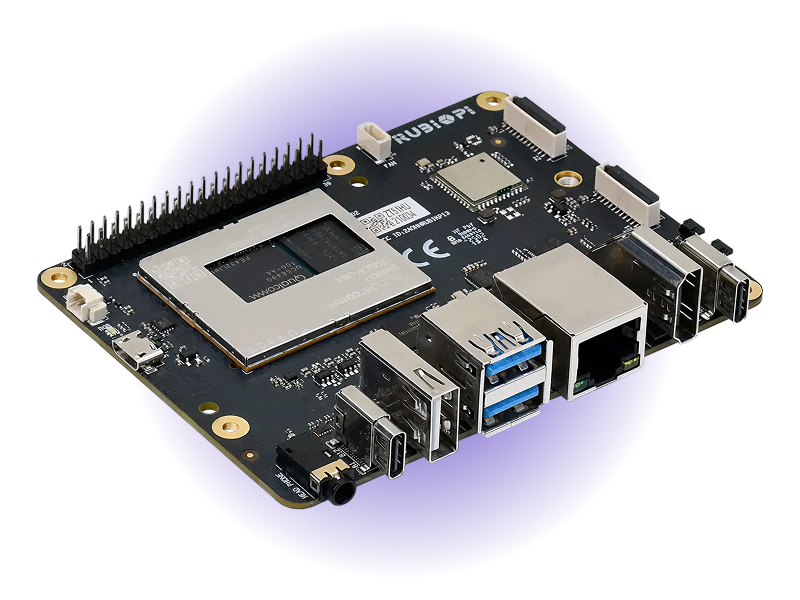
Rubik Pi 3
Affordable Qualcomm QCS6490 edge-AI SBC, production-ready with Avocado OS + Avocado Connect.
- 12 TOPSAI Performance
- QCS6490Octa-core Kryo 670 (6nm)
- 8GBLPDDR4x Memory
- 128GBUFS 2.2 Storage
- Adreno 643LGPU
- 100 x 75 mmPi-style form factor
Overview
The Thundercomm Rubik Pi 3 is a compact single-board computer built on the Qualcomm QCS6490 6nm SoC. It features a Raspberry Pi-like form factor with a 40-pin header, dual camera connectors, HDMI + USB-C display output, and Wi-Fi 5/BT 5.2. At approximately 4-8W power consumption, it delivers strong AI inference capability per watt — making it an affordable platform for on-device AI development and edge product prototyping.
With Avocado OS it becomes a production target: an immutable, composable Linux base with secure OTA updates, rollback protection, and fleet management through Avocado Connect.
Specifications
| Specification | Value | Notes |
|---|---|---|
| Processor | Qualcomm QCS6490, Kryo 670 octa-core | 6nm process |
| AI Performance | 12 TOPS | Hexagon Processor with fused AI-accelerator |
| GPU | Adreno 643L | |
| Memory | 8GB LPDDR4x | |
| Storage | 128GB UFS 2.2 | |
| Display (HDMI) | 1x HDMI 1.4 (4K@30) | |
| Display (USB-C) | 1x USB-C DP 1.4 (4K@60) | |
| Camera | 2x 22-pin 4-lane MIPI CSI | Raspberry Pi compatible |
| USB | 1x USB 2.0, 2x USB 3.0, 1x USB 3.1 Gen1 Type-C | |
| Ethernet | Gigabit Ethernet | |
| Wireless | Wi-Fi 5, Bluetooth 5.2 | |
| Expansion | M.2 M-Key, 40-pin GPIO header | |
| Dimensions | 100 x 75 mm | |
| Power | ~4W (CPU) / ~8W (full load) | USB-C PD 3.0 (12V/3A) input |
| OS Support | Avocado OS, Ubuntu, Yocto Linux, Android |
Use Cases
- Affordable AI development and education platform for embedded AI applications
- Smart display and kiosk prototyping with dual-camera computer vision
- Edge AI product prototyping with Raspberry Pi ecosystem compatibility
Getting Started
Init, Install, & Build
Follow the Any Supported Target instructions under Getting Started to begin. This target is rubikpi3. The provisioning specifics are below.
Provision
Provisioning flashes Avocado OS to the board's onboard UFS storage over USB while the device is in EDL mode. You'll need three cables: a USB-C power cable into the power input (port 10) — PD 3.0, 12V/3A; bus power is not enough; a USB-C data cable for flashing on the USB-C port (port 5); and a Micro-USB cable for the debug UART on the Micro-USB port (port 2). Leave the Micro-USB cable disconnected while flashing.
Put the board in EDL mode (hold the EDL button (port 12) while connecting power), then build and provision the dev runtime using the ufs profile.
avocado build
avocado provision -r dev --profile ufs
Run
Once provisioning completes, disconnect the USB-C data cable, leave USB-C power connected, and power-cycle the board — it boots Avocado OS from the onboard UFS storage. Connect the Micro-USB cable for the debug UART console. The root user is passwordless in the dev runtime used by this guide.