NanoPi R5S
A compact RK3568 network board with three Ethernet ports. Run it on an immutable Linux with a mainline kernel and atomic A/B updates.
nanopi-r5s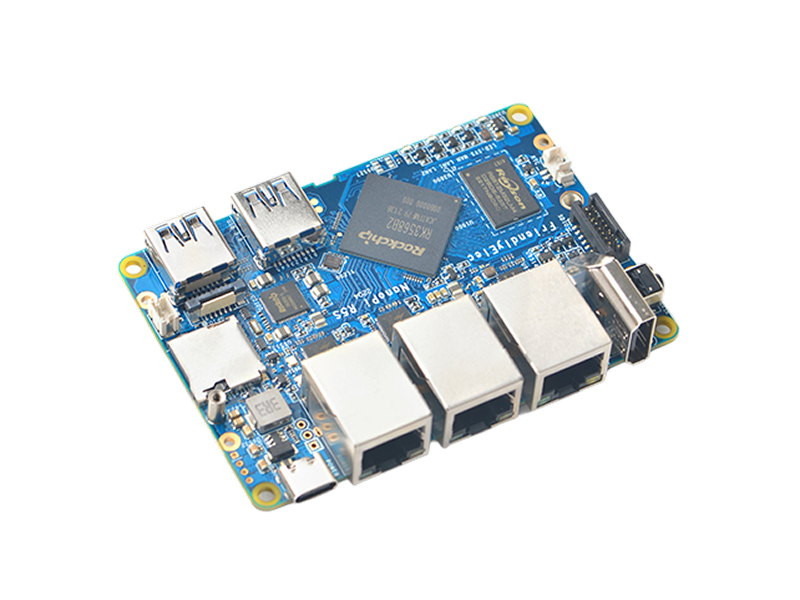
- RK3568B2Rockchip SoC
- 4x A55Cortex-A55 up to 2.0 GHz
- 2x 2.5GbEPlus 1x GbE
- 0.8 TOPSNPU
- 2GB / 4GBLPDDR4X Memory
- 8GB / 16GBeMMC Storage
Overview
The FriendlyELEC NanoPi R5S is a small network board built on the Rockchip RK3568. It has two 2.5GbE ports and one Gigabit Ethernet port. This board suits gateways and routers.
Avocado OS uses the mainline stack on this board: linux-yocto, mainline
U-Boot, and the Rockchip TPL and BL31 firmware. It does not use the
FriendlyELEC vendor BSP. The drivers and firmware for the board ship in the
avocado-bsp-nanopi-r5s extension, so the base image stays generic.
The target is nanopi-r5s, available on the 2026 release feed.
Specifications
| Specification | Value | Notes |
|---|---|---|
| SoC | Rockchip RK3568B2 | |
| CPU | Quad-core Cortex-A55, up to 2.0 GHz | |
| GPU | Mali-G52 | OpenGL ES 3.2, Vulkan 1.1, OpenCL 2.0 |
| NPU | 0.8 TOPS | |
| Memory | 2GB or 4GB LPDDR4X | |
| Storage | 8GB or 16GB eMMC, microSD slot | M.2 Key M slot (PCIe 2.1 x1) for NVMe |
| Ethernet | 2x 2.5GbE (PCIe), 1x GbE (native) | RTL8125B for the 2.5GbE ports |
| USB | 2x USB 3.2 Gen 1 Type-A | One port is also the MASK flashing port |
| Power | USB-C with PD, 5V, 9V, or 12V | The USB-C port supplies power only |
| Debug console | 3-pin header, 3.3V logic, 1500000 baud | Needs a USB-to-TTL adapter |
| Operating | 0°C to 70°C |
What Avocado OS Supports
We tested these functions on NanoPi R5S hardware with the nanopi-r5s target:
| Function | Status |
|---|---|
| Boot media | Boots from the eMMC and from a microSD card |
| Ethernet | All three ports come up, the 2.5GbE ports at 2.5 Gbps |
| OS updates | Atomic A/B updates, with boot counting and rollback in U-Boot |
| Two installed disks | Root, /var, and updates stay on the disk that the board booted from |
| Serial console | Login prompt on the debug UART |
Use Cases
Network Gateways
Three Ethernet ports let one board connect a field network to an uplink. Atomic updates keep the gateway image the same across the fleet.
Edge Routers and Firewalls
The 2.5GbE ports give room for routing and filtering at the edge. If an update does not commit, U-Boot boots the previous slot again.
Getting Started
Init, Install, & Build
Follow the Any Supported Target
instructions under Getting Started. This target is nanopi-r5s.
avocado init --target nanopi-r5s nanopi-r5s
cd nanopi-r5s
avocado install
avocado build
Connect the Serial Console
The debug UART is a 3-pin header (GND, TX, RX) at 3.3V logic. Connect a USB-to-TTL adapter to the header, then open the console at 1500000 baud:
tio -b 1500000 /dev/ttyUSB0
Provision to a microSD Card
-
Put the microSD card in a USB card reader on the host.
-
Write the image to the card:
Host machineavocado provision dev --profile sd -
Put the card in the board and connect power to the USB-C port.
Provision to the eMMC
The emmc profile writes the image to the eMMC over USB, with the board in
MaskROM mode.
-
Remove the microSD card, or use a card that has no bootloader on it.
-
Connect the USB 3.0/MASK port to the host with a USB-A to USB-A data cable. This is the corner USB-A port next to the microSD slot.
-
Push and hold the MASK button on the side of the board.
-
Connect power. Release the button about 3 seconds after the LED comes on.
-
Write the image to the eMMC:
Host machineavocado provision dev --profile emmc -
Disconnect the USB-A cable and power-cycle the board.
The sd-usb profile writes to the microSD card through the same USB-A port.
Use it when a bootable card is already in the board. It needs a U-Boot prompt
on the serial console, where you enter ums 0 mmc 1 before you provision.
Run
The board boots Avocado OS from the media that you provisioned. The root user
is passwordless in the dev runtime used by this guide. Log in on the serial
console, or use SSH when the device is on the network.